Monday, September 27, 2010

Frozen Butter Biscuits

My friend Stacy asked what I put my apple butter on, and I went through a list of things, but totally failed to mention my favourite thing to top with apple butter...

frozenButterBiscuits1

The trick to these fluffy, tender (but with a crispy outside) biscuits is using frozen butter, and not overworking the dough.

The science behind this, as explained by Chef Michael Smith, is that frozen butter gets into the layers of the dough and as it heats up in the 400 degree oven, the little bits of butter release steam, which creates flaky layers. Grating the butter in, is not only fast and easy, but it allows for less working of the butter (let's face it, cutting butter into pastry sucks, and the food processor may heat it up a bit), and the small pieces mean more poofy little flaky parts.

This hint would work with any flaky pastry, like pie crust. You can thank me by sending me baked goods. Thanks.

I took Chef Smith's recipe for Frozen Butter Buscuits and halved it. I didn't modify it at all (not that there was much to modify)...truth is, it's perfect the way it is! (I didn't add salt and pepper to the top because it was for breakfast, but if I make these at dinner, I do)

One of the most awesome things about this recipe, besides how easy and delicious they are, is that it takes about 20 minutes from start to finsh (as long as you planned ahead and put the butter in the freezer).

Frozen Butter Biscuits

2 cups all purpose flour
1 tablespoon baking powder
1 teaspoon salt
1 stick frozen butter
3/4 cup milk

Preheat oven to 400 degrees.

Whisk flour, baking powder and salt into a bowl. Grate in frozen butter (I cut the stick in half and grate one at a time, leaving the other in the freezer). Toss gently until butter is evenly distributed amongst the dry mixture.

Using the handle of a wooden spoon (it's gentler), mix while pouring milk into the bowl, until dough ball begins to form. Add another tablespoon or two of milk to gather up the dry bits if there are some, and fold to make sure everything is combined.

Make a flat disk on a lightly floured counter and cut into wedges (or whatever) and place on baking sheet. Bake 15 minutes, until golden brown, and serve warm.

frozenButterBiscuits
(No photo would show how tender, flaky and delcious this biscuit was)

Friday, September 24, 2010

Apple Butter

appleButter

We have lots of apples :)

My aunt and uncle have an orchard in Windsor, so I'm no stranger to apple recipes. You may see a few more while I whittle down the stash we picked up at Wagner Orchards.

This is a Michael Smith recipe...

Apple Butter

10 apples, cored and cut in quarters (I left the skins on)
1/2 to 1 cup brown sugar (to your taste)
1/2 cup apple cider
1/2 tsp cinnamon
1 tsp vanilla

Pop it on the stove, cover, and cook on medium high heat until apples break down and the pulp is thick and dark brown.

Puree with an immersion blender (or a traditional blender), put in a jar, and refrigerate.

I cooked it for about 3 hours on the stovetop. It could have been cooked down a little longer to make it thicker. I usually make it in the crock pot, but mine was in the dishwasher :)

Harvest Pork and Apple Bake

Campbell's (you know, the soup company?) has a ton of great recipes. How easy is throwing some rice, veggies, meat and soup into a casserole and baking it?

I found a recipe in a magazine for Harvest Pork and Apple Bake and made it up last night. As usual, I fiddled with it a smidge.

Recently, I talked about how blending flavours is easy if you know what tastes good together. Thanks to the Brady Bunch, we all know pork chops and applesauce work good together, so apples and pork tenderloin will be great, with the apple flavour strengthened through apple cider.

Harvest Pork and Apple Bake

harvestApplePork1

2 cups whole wheat yolkless broad egg noodles
1 carrot, peeled, quartered, and chopped
2 tablespoons oil
1 lb pork tenderloin, cut into 1/2" medallions
2 cups crimini mushrooms, sliced
1 small onion, sliced
1 can cream of celery soup (cream of mushroom or chicken would also work...and I bet cream of cheddar would be good too!)
1 cup apple cider
3 sprigs fresh thyme
1/2 tsp cinnamon
salt and pepper
1 red apple, unpeeled, cored and cut into wedges

Cook noodles and carrots in boiling, salted water until noodles are al dente.

Meanwhile, brown tenderloin medallions in a frying pan with a little oil (about 4 mins each side). I talked about browning meat before putting in the crock pot yesterday...same goes here. Brown the pork and give it a little caramelized flavour and it will make your dish extra delicious. Once cooked, put pork on a plate and put aside.

In the bottom of that frying pan is a delicious bunch of gunk created by caramelized sugars and proteins from the pork and it's going to help flavour the rest of your dish. Toss in the onions and mushrooms and cook on medium high heat until they are soft.

Turn up the heat, add apple cider to mushrooms and onions and deglaze anything left on the bottom of the pan that the mushrooms didn't pick up. Reduce cider, stirring frequently, for a few minutes (this will concentrate the flavours and thicken things up a bit).

Preheat oven to 350.

Turn heat down to medium and add soup, thyme sprigs (just throw them in whole...remember how many go in so you know how many twigs need to come out!) and cinnamon.

Toss drained noodles and carrots into sauce and stir to combine. Taste and add salt and pepper as needed.

Toss noodles, sauce and vegetable mixture into a 1 1/2 quart casserole (I used my oval shaped one over the round one so there's more room for the pork and apples on top, but use what you have!)

Arrange pork and apples on top (see photo above) and bake for 30 minutes, uncovered.

harvestApplePork

Apple Picking!

We went apple picking last Saturday. It had been YEARS since I'd been.

apples

Having a very active nearly 2 year old, we're always looking for things to do as a family that gets him out and active, and what better excuse in September than going apple picking? He loves apples, so it also serves as a little lesson in where his food comes from.

Wagner Orchards and Estate Winery was recommended to us by a friend.

It was perfect for us! Not ridiculously busy, equipment for Quinn to play on, apples (of course), a winery, and some good eats. I also love that it's family owned and run.

We bought a bag at the shop ($10 for a 13-15lb bag) and hopped onto the tractor's trailer. The tractor took us to the Gala section of the orchard and we walked back, picking as we went.

applePicking

Quinn loved picking the apples (there were plenty of branches low enough for him), and tried to eat each and every one. We wandered down the path, filling our bag with delicious apples (they use very few chemicals and try to use natural pest control over insecticides, when possible).

We wandered over the barn where Quinn talked to the cows.

Wagner's also sells beef that's hormone and antibiotic free. They are pasture-raised (but are finished on corn...that they grow themselves).

We walked across the grass to visit with the horses and donkey.

horses

We started back toward the buildings and "accidentally" wandered in through the winery door. There were a number of wines to choose from, but I was drawn to the ice fruit wines and picked up a bottle of the raspberry (they also had apple and blackcurrant, as well as some ice fruit wines blended with red), then followed my nose into the main shop.

There, I was tempted by some pies, strudels, sausage rolls, homemade Mennonite sausage...I wanted to tell them to just hand me a fork and put it on my tab, but I was good and only purchased some ground beef ($3.50 a lb - I made Lazy Cabbage Rolls with some of the beef and it was incredible!), a couple of strudels and some apple cider.

We went back outside and let Quinn loose on the the jungle gym!

slide

I really enjoyed Wagner Orchards and it was a perfect pace for Quinn at this stage. It wasn't super busy, had close proximity parking, allowed him to pick his own apples and contribute, gave him a safe place to run around, offered a few extras (like seeing the cows and petting the horses...and I swear I heard a sheep around somewhere), and a jungle gym for him to play on. We're also supporting a locally owned and run family business.

It was a great family outing, and we will definitely be back!

Thing about picking apples with the kids is that you usually end up with more than you can eat...so what have I done with our apples?

* Apple Butter
* Harvest Pork and Apple Bake

Thursday, September 23, 2010

Contest!

So I just got an email about the Dairy Goodness site, and I can't believe I haven't been there before!

They are running a contest right now where you just need to create a menu with their incredible recipes (I've already put a bunch in my Recipe Box to try) and then enter your meal into the contest.

You could win a $10,000 gift certificate to RENOVATE YOUR KITCHEN!!

Click here to register and begin creating your menu!

Unfortunately, this is only available to my fellow Canadians, but there are some mouthwatering recipes on that site...worth checking out.

Lazy Cabbage Rolls

When the weather starts to cool, it makes me really happy. It means that I get to start making some of my FAVOURITE food...chilis, stews, things with squash, and I get to pull out my crockpot!

I got my crockpot over 6 years ago from my dear friend, Dawn...it has made some amazing meals...sadly, it's nearly done for this lifetime. It's been pretty cranky the past couple of times I've used it. It might be time for a new one :(

So, I got really excited that we were having some cool weather, and planned to make Lazy Cabbage Rolls. Then we hit a warm patch.

We had them anyway.

The beef I used was hormone free stuff from a local farm, Wagner Orchards. Our awesome chiropractor and friend, Dan, recommended this place.

Lazy Cabbage Rolls

cabbageRolls1

1/2 head chopped cabbage (or 1 small cabbage)
1 lb ground beef
1 large onion, chopped
2 cloves garlic, minced
2 - 8oz can tomato sauce
Salt and pepper
1 cup uncooked brown rice
3 cups water
1 can condensed tomato soup
1 tablespoon brown sugar
1 tablespoon worcestershire sauce

Brown your ground beef in a skillet. This is an important step in any crock pot with meat type meal. Browning means caramalization, which means flavour! Take advantage of this opportunity while you can! Don prefers his ground beef to be in really small pieces, but since it's going to be in the crock pot all day, I don't fuss about the size of the pieces too much. I break it down into hunks, let it brown, and dump it in the crock pot.

Toss in cabbage, onion, garlic, ONE can of tomato sauce, rice, water, and salt and pepper. Give a stir, cover, and cook 4 to 6 hours.

If you're home, stir occasionally. If not, no biggie.

Approximately 2 hours before serving (or 1 hour if you're tight for time), mix the second can of tomato sauce, tomato soup, brown sugar and worcestershire sauce in a bowl and pour on top of casserole contents. Continue to cook.

Serve how you like it (we like a blob of sour cream).

cabbageRolls2

Wednesday, September 22, 2010

Coconut and Chicken Soup

I was very surprised by this soup. I love the way the flavours balance one another, and it's suprisingly hearty. I'm not one for "soup for dinner". It always leaves me wanting more.

The recipe I based this off of comes from a 2 year old issue of Chatelaine magazine, and it was labelled "Hot and Sour Chicken Soup". I didn't get the "hot and sour" vibe...but they did give a nod to the Thai flavours.

This could easily be made vegetarian by swapping the chicken stock for veggie, and the fish sauce for a titch of salt. The chicken could easily (and tastily) be replaced with firm tofu!

Sambal Oelek is a chili sauce that you may find at your grocery store, or in your local Asian or Dutch market. We love it and use it quite often. If it's not available to you, use any hot chili sauce you have on hand. In a pinch, you could use a dash or two of tabasco.

Coconut and Chicken Soup

coconutSoup

4 cups chicken stock
1 can coconut milk (not the light stuff)
Handful of button or crimini mushrooms, sliced
Two handfuls of shiitake mushrooms, sliced
Small can bamboo shoots, drained
1 tablespoon fish sauce (or less, to your taste)
1 tablespoon Sambal Oelek (more or less, to your taste)
2 limes
2 skinless, boneless chicken breasts
Fresh cilantro, chopped

Pour broth and coconut milk into a soup pot and stir to blend. Add mushrooms, bamboo shoots (mine came in strips and I cut them into matchstick sized pieces to add interest and make them easier to eat), fish sauce, and the sambal. Add zest and juice of both limes. Bring to a boil.

While waiting for the soup to heat, cut chicken into bite sized strips. Once soup is boiling, add chicken. Give it a stir and reduce heat to simmer. Cook about 10 minutes, until chicken is fully cooked. Taste and adjust salt and chili sauce balance if necessary.

Serve with a sprinkle of cilantro.


This soup was a hit with all three of us, and Quinn loved the spicy broth. He is still not really a fan of the mushrooms but neither was I when I was younger. He ate the chicken and drank the broth.

Wednesday, September 15, 2010

Quick and Easy...Szechuan Stir Fry

See, not everything I make is fancy pants! Some nights I just want to throw something together and hang out with Quinn, or get some knitting in.

Last night, was one of those nights.

chickenStirFry

We have some beef in the freezer that I wanted to cook up. I thawed it, cut it thinly and browned it in a frying pan with some chopped mushrooms.

Pulled a bag of frozen "Asian veggies" from the ice box, stir fried them up in a wok, added the meat, and poured in some bottled sauce.

Yeah, I said it...bottled sauce.

Some days you just need a break.

I put the whole mess over some brown and red rice that I'd cooked up and called it a meal.

The sweater in the background is the Parfait Tunic from the talented Heather Dixon of Army of Knitters.

I'm almost to starting the sleeves and I'm so anxious to complete this sweater so I can wear it!

Monday, September 13, 2010

"Smells Like Comfort Food"

That's what Don said when he walked in the door.

Meatloaf

meatloaf

This is not the sexiest food photo ever, but man, does it taste good!

You can make the meat part however you like. Some like combinations of meat. I prefer lean ground beef. Seasoning can vary...you can use onion soup mix, or your own combination of spices and veggies.

This meatloaf had some Montreal steak spice, soya sauce, worcestershire sauce and chopped onion. I also usually put milk moistened bread crumbs in the mix because Don likes a tender, crumbly meat loaf. If you like yours a little more solid, add an egg. It's important to note that you shouldn't overwork your meat because it might make it tough. I usually mix all my stuff in the bottom of the bowl first, then squish the meat in until everything is just mixed.

I have started making, essentially, a giant burger on a sheet pan so that there's more surface area to caramelize, rather than a loaf pan...though the loaf pan makes for a nicer looking slice on the plate.

The "money" of my meatloaf is the topping. It's a combination of ketchup, brown sugar and dry mustard. I mix it up, adjusting until I am happy with the flavours, and smear it on before cooking.

How do you do your meatloaf?

Potato and Cheddar Soup

potatoCheddarSoup

This is another one of those "throw what you have in a pot" type recipes, but I'll do my best to approximate what I use.

Chop an onion and a couple of cloves of garlic and sweat in a soup pot. Meanwhile, peel and chop 5 potatoes. Toss them into the pot to warm a bit, then add 2 cups stock. Add some thyme if you have it, and let simmer (covered) for about 20 minutes, or until the potatoes are very soft. This will be dependent upon how small and evenly you cut the potatoes in the first place.

Add 2 cups milk, and bring up to simmer (do not boil!). Continue to simmer about 10 minutes, remove from heat, and hit with an immersion blender (also called a stick blender...if you don't have one, whir it up in the blender or food processor and then put it back in the pot). Pureeing the potatoes is what is going to thicken this soup, but some people like some chunky texture. You control the degree of smoothness!

Add about a cup of shredded sharp cheddar (or whatever blend of cheese you have). Honestly, it's rarely only a cup that goes into the soup. I start with about that, and taste, adding more as I go until it tastes the way I like it. Season with salt and pepper and serve immediately.

This time, we had some proscuitto in the fridge, so I chopped it and fried it until crisp. This plus some raw chopped green onion served as our topping, but you could add anything you like on a loaded baked potato...even more cheese (I love cheese!)

Wednesday, September 8, 2010

Nothing fancy to report...

Last night, Don was away at supper, so Quinn and I just had pierogies (and I had a salad). Unfortunately, they were the frozen kind. If you've ever had proper, fresh made pierogies, you know that the frozen ones just don't live up to those, but they are fast and easy to make.

So...no photos today. It was a pretty boring and unimaginative (but practical) meal.

One of my friends asked about my photographs. She wanted to know if I staged them. Usually, no, I don't (though I have brought one dish down to my light box to shoot it, but I didn't do anything fancy to it). Seriously...by the time the food is ready to be eaten, I'm hungry and want to eat. Truth be told, I usually photograph Don's plate because mine usually looks like a pile of slop, but I don't make any special adjustments to it just to photograph it.

I usually have to be quick, because Don is generally standing there, just off camera, asking "Are you finished yet?"

At least I know he likes my cooking!

Tuesday, September 7, 2010

What to make when you have chicken that HAS TO BE cooked?

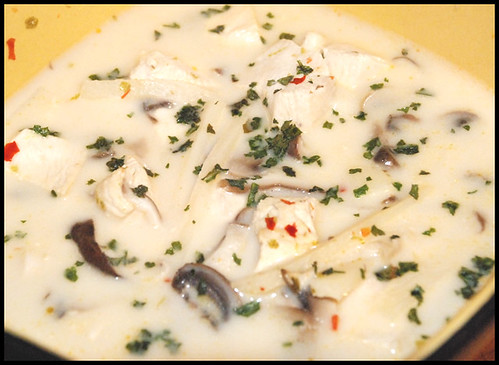
So, I took some chicken out of the freezer the other day with the intention of making a stir fry. I have some bottled schezwan sauce that I was planning on tweaking a bit, and some frozen "stir fry" veggies. Nice, quick, easy...except I really wasn't in the mood for eating stir fry.

That's one of the down sides of planning your meals ahead. Everything sounds so delicious when you make your list, but by the time you need to start cooking it, you might not want it.

I HAD to cook this chicken. What was I going to make?

I opened the fridge, stared in there blankly for a while, then closed the door. Opened the cupboards, stared in there blankly for a while, then closed the door. Got distracted by Iron Man Armored Adventures with Quinn, then realized that we needed to eat and I needed to stop procrastinating...and then it hit me.

I had an idea!

Checking the fridge again, I had eggs, mozzarella, parmesan, lettuce, caesar dressing, focaccia, and the chicken. In the cupboard I had jarred pasta sauce, spaghetti, and bread crumbs.

This was a no brainer...I can't believe I didn't think of it sooner!

Chicken Parmasan!

I don't have measurements here...because it's not really a recipe that you need to follow to the letter. Remember, a few posts ago when I said that you just need to know what tastes good and then put those flavours together? If you've ever had chicken parm in a restaurant, you already know how it works...you just need to have a little faith in yourself and give it a go!

You can do it (Tom *cough*)!

So here's what I did...the timing is pretty easy on this meal as well.

- Preheat the oven to 350 degrees.

- Rinse and pat dry chicken breasts (I cooked up 3 small ones, boneless, skinless).

- In shallow bowl, beat one egg.

- In second shallow bowl (or plate), put some bread crumbs (I'd say about 1/3 cup?), pepper, a titch of salt, and a handful of parmesan cheese (either freshly grated, by you, or that stuff you buy in the fancy pants cheese section already grated for you...not the Kraft stuff), and some italian herbs, dried, whatever...I used some chopped fresh basil from the garden. Alternately, you can also buy some "Italian seasoned bread crumbs" and not have to fuss about it.

- Get a baking sheet, line with foil (because I'm lazy and hate washing baking sheets). I also use a baking rack so that the chicken gets crispy on the bottom too, but that's not imperative. It's not the end of the world if you don't have one.

- Dip a chicken breast in the egg, and then the breadcrumbs to coat. Place on baking sheet (or rack) and repeat.

- Pop chicken into preheated oven for about 20 to 30 minutes, depending on how big they are. I use two methods to check doneness...a digital thermometer should read 165F to kill all the pathogens (plus, it will continue to cook a bit after you remove it, AND you'll be putting it back in to melt the cheese anyway), or I actually cut it open and look. For this recipe, you're going to be covering it up anyway. Who cares if there's a cut in it?

Ok, so you have about 20 minutes to kill at this point. Why not make some homemade croutons?

I have some "Tuscan Herb Focaccia" for some portobello burgers later this week. I cut one up into cubes, tossed in some olive oil, placed in another (foil lined) baking dish, and toasted in the oven. Keep an eye on them so they don't burn, but you're looking at about 10 minutes. Pull them out and let them cool.

Pasta cooking time (you still with me, Tom?)

- Put a pot of water on to boil.

As far as timing goes, the chicken should be nearly done when the water boils. This is where you need to be a multitasker, but it's nothing you can't handle (Tom).

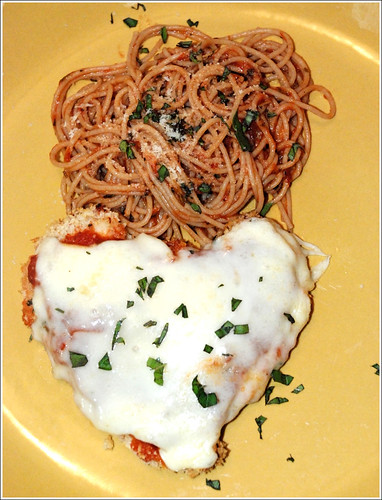
Get all your stuff together in these last moments: jar of tomato sauce (I used PC Fire Roasted Tomato Sauce because it's what we had), slice some mozzarella (maybe 1/4" thick?), pasta (we love the Healthy Harvest spaghetti), mixed greens, parmesan cheese, caesar dressing, and croutons.

Ok, you ready?

- Put pasta in boiling, salted water and turn down a bit so you don't have boil over. Stir this pasta occasionally so it doesn't stick.

- Pull chicken out of the oven. Spoon a couple of tablespoons of sauce (yup, right out of the jar!) onto chicken breasts and top with sliced mozzarella. Sprinkle on a bit more parmesan cheese, and place back in oven to melt.

- Start your salad. Place a couple of tablespoons of ceasar dressing (we use the type you find in the produce section...it's super tasty!) in the bottom of a bowl, toss in your mixed greens, and mix to coat with dressing. Serve in bowls, toss in a few croutons, and top with a bit of parmesan cheese (I love using a veggie peeler to slice cheese ribbons on top...looks all "fancy pants")

Salad is done.

- Check your chicken...cheese should be melted by now. If you like a little browning on top, hit up the broiler and KEEP AN EYE ON IT! I like it just melty, and I'm a total spaz, so I avoid the broiler thing as much as possible (or most of what I make would be burnt).

Chicken is done.

- Check your pasta. Should be al dente (we should all know what that means by now, but if you like your noodles smushy, cook it until you like it). Drain pasta in a colander. While it's doing its thing in the sink, pour some of that jarred sauce into the bottom of the hot (now dry) pasta pot, give the colander a shake to get rid of any extra water, and plop the pasta into the warming sauce. Toss it around to coat with sauce, and you're ready to plate!

Pasta on the plate, chicken beside it, a little more shredded parmesan (Death by Parm?), pepper, fresh chopped basil if you have it, et voila! You've made a really fancy fricken dinner, using what you probably have in your cupboards, and it was pretty easy, no?

Enjoy, and revel in the compliments.

chickenParm

Friday, September 3, 2010

This is the post where I admit my food sucked

Last night I tried a new recipe...it was a really nice macaroni and cheese with spinach and proscuitto. The mozzarella on top was all melty and brown, the sauce was nice and creamy...mmmmm.

Holy crap, was it salty! Don says that other than the saltiness, it was tasty. I was too disappointed to agree.

I made a point to undersalt the sauce, knowing there was parmesan in there and there was going to be proscuitto added to it before it baked. What I forgot about was the pasta.

See, I salt my water (as one should unless they have dietary restrictions) "like the sea". The recipe calls for draining the pasta but for 1 cup of pasta water. The starch in the water would help bind with the thick sauce, and make it perfect and creamy and help it cling to the pasta.

No problem, except I didn't factor in the salt levels in the pasta water and that resulted in a nearly inedible meal.

Sucks, that. But you know, the recipe itself has potential. I'll try it again in a while and make a few adjustments.

Wednesday, September 1, 2010

Curry Cream Tortellini

Not sure where I got this one from, but it was jotted down in my recipe file. It turned out pretty good (of course, I made some adjustments) but I would consider thickening the sauce a bit before serving. Maybe with a cornstarch slurry.

Although, it made a really tasty soup like dish! I served it with a side salad of mixed baby greens and a garlic papadum that I toasted up in the microwave.

Curry Cream Tortellini

curryCreamTortellini

1 shallot, finely chopped
1 jalapeno, seeded and finely chopped (you can omit this if you're spice sensitive)
2 teaspoons curry powder
1 clove garlic
2 tablespoons olive oil
1 1/2 cup vegetable stock
1 14 oz can coconut milk
1 package tortellini (we used cheese, mushroom would be wicked good!)
4 large basil leaves, chopped
1 tablespoon honey
1 tablespoon fresh ginger
Chopped peanuts (optional)

Heat oil in saucepan and soften the chopped shallot and jalepeno (for a minute or two). Grate in garlic and add curry powder. Heat until the curry powder warms (you'll smell it!)

Add veggie broth carefully (curry facial anyone?) and bring up to a boil. Turn down to a simmer and let it do its thing for about 5 minutes, stirring a couple of times.

While that's going on, toast your chopped peanuts by placing them in a dry frying pan over the heat, shaking often, until you smell them, then remove from heat. Keep a close eye on them though, because one second it may look like they are golden brown, and the next second they will be charred and leave a horrific smell in your house that won't go away for hours. Don't say I didn't warn you.

Back to the saucepan: Pour in coconut milk, tortellini, honey and grate in ginger (I keep mine in the freezer...grates like a breeze and lasts a lot longer than leaving it out). Bring up to a simmer (DON'T BOIL) and stir until pasta is nearly done. Sprinkle in basil at the last minute, let pasta finish cooking, and serve with toasted peanuts on top if you like.

I had some store bought papadums in the cupboard so I oiled them lightly and tossed one at a time into the microwave for about 40 seconds. Burnt papadum is another one of "those smells that never go away" so keep an eye on them.