There are some great combinations at The Melting Pot. If you choose to have your own Fondue Feast Night, maybe some of their offerings may inspire you!
Cheese Fondues
Fondue a la France - Baby Brie, Gruyere, Raclette, bacon, onions, white truffle cream and fresh chives
Spinach Artichoke Cheese Fondue - Fontina, Butterkase, spinach, artichoke hearts, garlic
Fiesta Cheese Fondue - Cheddar cheese with Mexican herbs, spices, jalapeno peppers, and salsa (served with tortilla chips)
Wisconsin Trio Cheese Fondue - Fontina, Butterkase and buttermilk bleu cheeses, white wine, scallions and sherry
Traditional Swiss Cheese Fondue - Gruyere and Emmethaler, white wine, garlic, nutmeg, lemon and Kirschwasser
Chocolate Fondues
White Chocolate Creme Brulee - white chocolate and caramelized sugar
The Original - milk chocolate with crunchy peanut butter
Disaronno Meltdown - White chocolate with Disaronno (flambéed)
Cookies N Cream Marshmallow Dream - Dark chocolate with marshmallow cream, flambéed, and topped with Oreo cookie crumbs
Flaming Turtle - Milk chocolate, caramel and chopped pecans (flambéed)
Pure Chocolate - the title says it all.
Bananas Foster - White chocolate, bananas, cinnamon, and flambéed.
Yin and Yang - Half dark chocolate, half white chocolate
Chocolate S'mores - Milk chocolate topped with marshmallow cream, flambéed, and topped with graham cracker crumbs.
Other add ins they suggest are Baileys, Cointreau, Grand Marnier, Chambord, or Tuaca.
Wednesday, December 29, 2010
Fondue Feast - The Recipes
At this point, I feel I need to throw out some warnings.
- Don't eat right off the fondue fork (it could be stupid hot). Put your food on your plate and eat with a regular fork.
- If you're doing the meat course, take necessary food safety precautions (because you're dealing with raw meat), and never put raw meat on the plate you'll be eating off of.
Cheddar Cheese Fondue
Half a bottle of lager (or so)
1/4 tsp mustard powder
1 clove (or more) garlic
3 tblsp Worcestershire sauce
80% sharp cheddar cheese
20% Emmenthaler cheese
1 tblsp corn starch (optional)
Freshly cracked black pepper
Grate cheeses and toss with a little cornstarch (this will both absorb some moisture, keeping the cheese shreds apart, and help thicken the fondue a little - it's not absolutely necessary).
Pour beer into your fondue pot and crank it. Add mustard powder, and grate in garlic (or drop in finely minced garlic). Once boiling, lower heat a bit and add cheese, bit by bit, stirring in a figure 8 motion, until melted. Continue adding cheese until fondue reaches desired consistency. It's better to be a little on the loose side than too thick. It will thicken a little as the course goes on. Top with a little freshly ground pepper.
Serve with bread (cubes of french, rye, and pumpernickel, soft pretzel nuggets, cubes of granny smith apples, baby carrots, celery sticks, broccoli, cauliflower, whatever else you can imagine would be great with beery, garlicky melted cheese)
Spinach Salad
Baby spinach, hard boiled egg slice, sliced red onion, sliced cucumber, sliced roma tomatoes, shredded Emmenthaler cheese
Don's Favourite Dressing
1/2 cup oil
1 cup ketchup
1/2 cup sugar
1/4 cup white vinegar
1/4 cup water
1 tsp garlic salt
1 tsp black pepper
pinch salt
Put all ingredients into blender (except oil) and blend, then add oil slowly while running blender and store in an airtight container in the fridge.
Coq Au Vin Cooking Liquid for Main Course
3 1/2 cups vegetable stock
1/2 cup burgandy wine
1/2 cup sliced mushrooms
1 tblsp garlic, minced
2 green onions, sliced
Heat vegetable stock in a fondue pot until it begins to simmer. Add all other ingredients and bring back to a simmer.
Serve with filet mignon, marinated (or not) cubed chicken breast, marinated (or not) sirloin or NY strip steak, marinated (or not) pork tenderloin, ravioli, partly cooked fingerling potato pieces, mushroom caps, etc. and various sauces.
Make sure to have a slotted spoon at the table for fishing out ravioli and veggies. Don't leave the slotted spoon in the fondue pot when you're not using it because it will get ridiculously hot.
Reminder again: Use all necessary food safety precautions when handling the raw meat and cook to safe temperatures (chicken to 165 degrees and beef at least to 145 degrees)
Green Goddess Dressing
This is one of my favourite things about fondue night. It needs to be made in advance.
8 oz cream cheese, cut into cubes
1/2 cup milk
1/4 cup sour cream
2 tblsp finely chopped onion
2 tblsp finely chopped parsley
2 tblsp finely chopped chives
Microwave cream cheese and milk for 2-4 minutes, whisking after each minute until cream cheese melts and mixture is smooth. Stir in sour cream, onion, parsley and chives. Refrigerate. It will thicken as it cools.
This is really good spooned into cooked mushroom caps and served with the potatoes.
Chocolate Fondue
10 oz chocolate chips (milk chocolate, white chocolate, dark chocolate, or a blend...up to you)
1/2 to 3/4 cup half and half cream
1/2 tsp vanilla
(we stir in Skor bits, but you can stir in marshmallow fluff, peanut butter, Bailey's Irish Cream, espresso powder, chocolate cookie crumbs...the sky's the limit)
Melt chocolate in the microwave (medium power, 2 minutes). Stir occasionally to keep from burning. Pour into heated fondue pot (I use my stoneware one for the chocolate) and stir in your choice of add ins.
Serve with pineapple, strawberries, banana slices, brownie bites, pound cake bites, mini cheesecakes (you'll want to put the cheesecake on your fork and spoon chocolate over top...it won't stay on your fondue fork), pretzels, marshmallows, graham crackers...whatever goes with chocolate!
Fondue? Yes Please!
I was introduced to fondue in 2004, by some coworkers. Our Christmas party was cheese and chocolate at The Melting Pot at the Charlotte University location.
I was hooked...and I wanted more.
For the next few years, I ate there once every month or so. You know you are a "regular" when the manager sends kitchen staff out to get Heath Bars at the store so they can make your favourite chocolate (it had been removed from the menu). I mean, I never had to ask for it...they would just bring it "my way".
When I moved back to Canada, I was sad to find out that there wasn't a Melting Pot anywhere nearby. They have since opened one in Grand Rapids, MI, but that's a long way to travel just to get melted cheese.
So I set to making my own "Big Night Out". This has become a New Years Eve tradition for the past 3 NYEs and it will continue tonight.
I'll probably break this up into a few posts, because it's going to be long...let's call this one:
My Inspiration
When you go to the Melting Pot, you are given a menu. You could do just cheese, just chocolate, or the whole shebang.
I recommend the whole shebang.
WWJD? (What Would Jacy Do?)
It's a lot of prep, but it's totally worth it, and there are ways to make things easier on you. Plan ahead.
Today is Wednesday, NYE is Friday. I'm making my shopping list today, and will be doing the shopping tomorrow (to avoid the "day of" rush). I will prep the food Friday, and when suppertime rolls around, all I'll need to do is throw it together.
So here's the menu:
Appetizer - Beer & cheddar fondue with granny smith apples, soft pretzel sticks, french bread, carrots and celery
Salad - Spinach salad
Main course - Coq au Vin cooking method with filet mignon, meatballs, chicken, potatoes, mushrooms (sauces: green goddess, bbq, teriyaki, anything else I can find)
Dessert - Milk chocolate and Skor bits, with brownie chunks, bananas, strawberries, pineapple, graham crackers
Drinks - Red wine of Don's choosing and possibly a girly martini style cocktail.
Thursday, December 23, 2010
Candy Cane Marshmallows
This is a Martha Stewart gem. It takes a little bit of effort but man, it tastes ridiculously good!
If you're going to make these, keep in mind that you need to let them set for at least 3 hours but overnight is best. It makes 16 GIANT marshmallows. You can obviously make smaller ones (but they won't be as much fun).
Every sip of your hot chocolate gives you a little slurp of gooey melty minty marshmallow.

Vegetable oil cooking spray
2 cups white sugar
1 tablespoon light corn syrup
4 packages unflavoured gelatin
3/4 teaspoon peppermint extract (though cinnamon would be really good too!)
2 large egg whites
Red food colouring (optional)
Coat an 8" square baking pan with cooking spray. Line bottom of pan with parchment paper and spray that too.
Put sugar, corn syrup and 3/4 cup water in a small saucepan. Cook over medium heat, stirring until sugar is dissolved. Raise heat to medium high, pop in a candy thermometer, and cook until it reaches 260 degrees. That's "firm ball stage" btw, if that's how you do things.
As the sugar cooks, sprinkle gelatin over 3/4 cup water in a heatproof bowl. Let stand about 5 minutes, to soften. Meanwhile, put a pot of water (the right size to pop the heatproof bowl into, to create a double boiler) on to boil. Place bowl onto simmering water and whisk until all the gelatin is dissolved. Remove from heat and add peppermint extract. Set aside.
Beat egg whites in the bowl of an electric mixer until stiff (but not dry) peaks are formed. With the mixer running, slowly add the gelatin into the egg whites. When sugar has reached 260 degrees, remove from heat and (with mixer still running) slowly (but steadily) add sugar to egg white and gelatin mixture.
Mix on high speed until very thick, about 12-15 minutes.
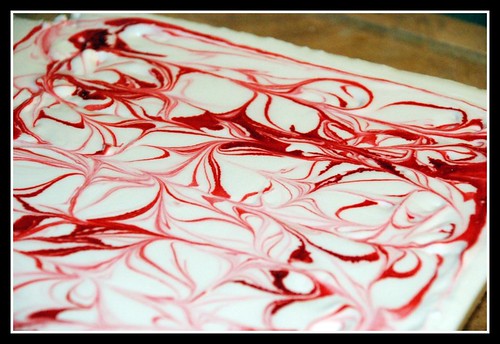
Pour mixture into prepared pan and very quickly drop a few drops of food colouring (if using) on the surface, and drag through with a toothpick, skewer or knife to create a swirly design.
Let stand, uncovered, at room temperature for at least 3 hours but preferrably overnight, to set up.
Cutting these fluffy squares of deliciousness was a real pain in the rear. My solution was the same as cutting the cheese...uh, I mean cutting soft cheese.
Dental floss. (How's that for irony?)
Run a knife along the sides of the pan to loosen the edges, then get the tip of the knife under the parchment paper and slip the whole thing out onto the counter. Take a length of dental floss and slide it between the parchment and the bottom of the marshmallow. It should go very easily. Position both sides to the approximate center and lift both ends to meet in the middle. The floss will slice cleanly through the marshmallow. It might not look like it, but it did.
Repeat, repositioning and slicing until you have the desired number of marshmallows.
Martha, of course, has these goodies all perfecly packaged in cellophane bags. I tried to put one of mine in a cellophane bag and it looked like a bit of a marshmallow crime scene.
My solution was to cut a length of parchment paper (because they are still fairly sticky), lay out four marshmallow squares side by side, fold the long sides up and over, and fold the short ends into a triangle, rolling to secure.
If you're going to make these, keep in mind that you need to let them set for at least 3 hours but overnight is best. It makes 16 GIANT marshmallows. You can obviously make smaller ones (but they won't be as much fun).
Every sip of your hot chocolate gives you a little slurp of gooey melty minty marshmallow.
Vegetable oil cooking spray
2 cups white sugar
1 tablespoon light corn syrup
4 packages unflavoured gelatin
3/4 teaspoon peppermint extract (though cinnamon would be really good too!)
2 large egg whites
Red food colouring (optional)
Coat an 8" square baking pan with cooking spray. Line bottom of pan with parchment paper and spray that too.
Put sugar, corn syrup and 3/4 cup water in a small saucepan. Cook over medium heat, stirring until sugar is dissolved. Raise heat to medium high, pop in a candy thermometer, and cook until it reaches 260 degrees. That's "firm ball stage" btw, if that's how you do things.
As the sugar cooks, sprinkle gelatin over 3/4 cup water in a heatproof bowl. Let stand about 5 minutes, to soften. Meanwhile, put a pot of water (the right size to pop the heatproof bowl into, to create a double boiler) on to boil. Place bowl onto simmering water and whisk until all the gelatin is dissolved. Remove from heat and add peppermint extract. Set aside.
Beat egg whites in the bowl of an electric mixer until stiff (but not dry) peaks are formed. With the mixer running, slowly add the gelatin into the egg whites. When sugar has reached 260 degrees, remove from heat and (with mixer still running) slowly (but steadily) add sugar to egg white and gelatin mixture.
Mix on high speed until very thick, about 12-15 minutes.
Pour mixture into prepared pan and very quickly drop a few drops of food colouring (if using) on the surface, and drag through with a toothpick, skewer or knife to create a swirly design.
Let stand, uncovered, at room temperature for at least 3 hours but preferrably overnight, to set up.
Cutting these fluffy squares of deliciousness was a real pain in the rear. My solution was the same as cutting the cheese...uh, I mean cutting soft cheese.
Dental floss. (How's that for irony?)
Run a knife along the sides of the pan to loosen the edges, then get the tip of the knife under the parchment paper and slip the whole thing out onto the counter. Take a length of dental floss and slide it between the parchment and the bottom of the marshmallow. It should go very easily. Position both sides to the approximate center and lift both ends to meet in the middle. The floss will slice cleanly through the marshmallow. It might not look like it, but it did.
Repeat, repositioning and slicing until you have the desired number of marshmallows.
Martha, of course, has these goodies all perfecly packaged in cellophane bags. I tried to put one of mine in a cellophane bag and it looked like a bit of a marshmallow crime scene.
My solution was to cut a length of parchment paper (because they are still fairly sticky), lay out four marshmallow squares side by side, fold the long sides up and over, and fold the short ends into a triangle, rolling to secure.
Wednesday, December 22, 2010
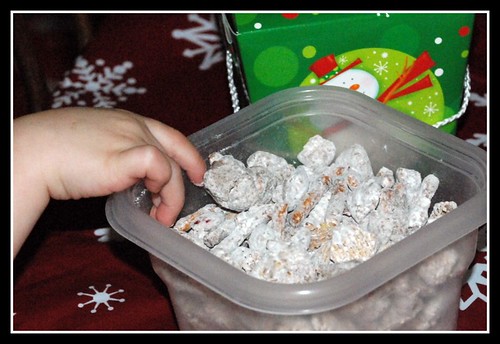
White Trash
Some call it Puppy Chow, some call it Christmas Crack...I call it "addictive". It's easy to make, and I guarantee that if you put this out, people are going to keep going back to it.
Unless they are allergic to nuts, in which case, I'd maybe avoid it. That might end badly.
If you are a purist, you'll just use cereal...and that will make people plenty happy. I like a little variety.
What you need...
1 box of Chex (or, if you're in Canada, Crispix)
1 cup thin pretzel sticks, snapped in half
1 cup holiday coloured M & M's
(you can really put anything you like in here...peanuts, almonds, popcorn, whatever...just make sure you have enough coating. It's probably against the law somewhere to skimp on the coating.)
1/2 cup butter
1 1/2 cup milk chocolate chips
1/3 cup peanut butter
1 tsp vanilla
1 big ziplock bag
1 cup icing sugar (confectioner's sugar, powdered sugar, whatever you call it)
In a very large bowl (I usually use 2, so I have room to mix), toss together your snack ingredients.
Lay parchment paper on 2 baking sheets and have them ready.
In a microwave safe bowl, toss in butter, chocolate chips and peanut butter. Nuke on high until melted, stirring often (burnt chocolate is no one's friend). Stir in vanilla quickly, and pour into bowl with all the cereal goodness in it. Mix to coat as best you can, maybe get your hands into it? Whatever works.
Lay out on parchment lined baking sheets to set up 20 minutes or so.
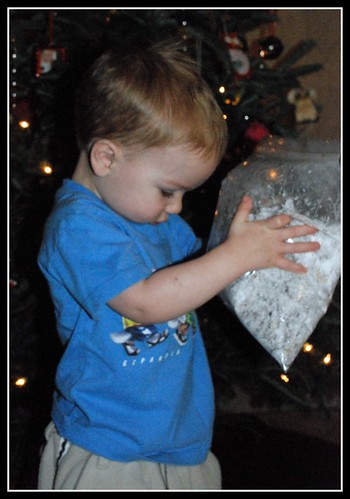
I usually shake the White Trash in 3 batches. Put some powdered sugar at the bottom of the ginormous ziploc bag, scoop some chocolate covered stuff in the bag, top with some more powdered sugar, zip up the bag (securely - it sucks when you *think* it's closed but it's not...ask me how I know) and shake. Feel free to dig into those chunks of chocolate to break them up a bit. Add more sugar if needed.
Enjoy!
Unless they are allergic to nuts, in which case, I'd maybe avoid it. That might end badly.
If you are a purist, you'll just use cereal...and that will make people plenty happy. I like a little variety.
What you need...
1 box of Chex (or, if you're in Canada, Crispix)
1 cup thin pretzel sticks, snapped in half
1 cup holiday coloured M & M's
(you can really put anything you like in here...peanuts, almonds, popcorn, whatever...just make sure you have enough coating. It's probably against the law somewhere to skimp on the coating.)
1/2 cup butter
1 1/2 cup milk chocolate chips
1/3 cup peanut butter
1 tsp vanilla
1 big ziplock bag
1 cup icing sugar (confectioner's sugar, powdered sugar, whatever you call it)
In a very large bowl (I usually use 2, so I have room to mix), toss together your snack ingredients.
Lay parchment paper on 2 baking sheets and have them ready.
In a microwave safe bowl, toss in butter, chocolate chips and peanut butter. Nuke on high until melted, stirring often (burnt chocolate is no one's friend). Stir in vanilla quickly, and pour into bowl with all the cereal goodness in it. Mix to coat as best you can, maybe get your hands into it? Whatever works.
Lay out on parchment lined baking sheets to set up 20 minutes or so.
I usually shake the White Trash in 3 batches. Put some powdered sugar at the bottom of the ginormous ziploc bag, scoop some chocolate covered stuff in the bag, top with some more powdered sugar, zip up the bag (securely - it sucks when you *think* it's closed but it's not...ask me how I know) and shake. Feel free to dig into those chunks of chocolate to break them up a bit. Add more sugar if needed.
Enjoy!
Sunday, December 19, 2010
Tortiere
I have been on a quest to make "the" tortiere that I will always make. It's a tradition in the Courtemanche household to have one (or 3) meat pies at Christmas, so the past few years, I have been playing with recipes.
I think this is the one.
I made four, so divide the measurements as needed. I cooked it all up in a stock pot (browning the meat in a couple of batches in a frying pan). If you are making one pie, you could do it all in a frying pan, I'm sure. If you don't want to do the math, they freeze really well, and are great "cozy food" for those cold winter nights.
I also used all beef this time, but you could use a combination of ground meats (beef, pork, veal, venison, moose)
6 medium russet potatoes, peeled and cubed
3 large yellow onions
30 or so crimini mushrooms
3 stalks celery
1 family size package of ground beef (just under 2 kg)
4 cups beef stock (1 tetra pack)
8 cloves garlic
3 stalks fresh thyme
1 tsp ground cloves
1 tsp ground cinnamon
4 bay leaves
1 tablespoon honey (or sugar)
Salt and pepper
1 egg yolk
Boil potatoes in salted water until tender. Drain and mash. Set aside. You don't really need to add cream or butter, because it's going to be used a binding agent and will soak up all the gravy. Having said that, I did add a little milk to make it easier to mash, and seasoned with salt and pepper to taste.
I chose to chop up my veggies in a food processor because I didn't want chunks of veggies, but I did want the flavour. If you would rather dice your veggies by hand, go nuts. It's your pie.
Chop mushrooms, celery, and onions and soften in a stock pot with a little bit of olive oil. At this point, I was also browning the ground beef in a frying pan. Add stock, garlic, honey, thyme (if you have fresh thyme, just throw the whole twig in...the little leaves will come off and all you'll need to do is remove the stalk), cloves, cinnamon and bay leaf. When meat is browned, drain and add to the stock pot with everything else (except the potatoes). Simmer for a while until stock is reduced (you don't want it too soupy, but you don't want it too dry...how's that for vague?). Remove bay leaves and thyme stalks. Taste for seasoning and adjust with salt and pepper.
Mix in potatoes, spoonful by spoonful, until it's a good consistency. I didn't need to use all my mashed potatoes, maybe had 1/2 cup leftover, but next time it could be a different story.
I used premade pie shells (the TenderFlake deep dish dealies), so if you make your own pastry, do what you do. I use two premade pie shells per pie (one for the bottom and one for the top) and because there was one year the bottom crust was still a little soggy, I took my Mother in Law's advice, and prebaked the bottoms before filling.
So, I put the oven on 400, pierced 4 shells with a fork, and popped them in the oven for a few minutes, until the bottoms were dry (but not completely done). Once they were done, I filled them full of filling.
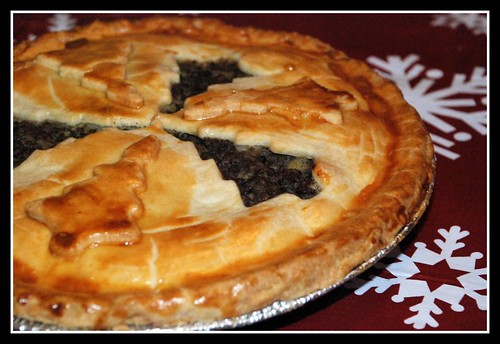
I tipped one of the unbaked and thawed pastry shells onto the counter and cut out shapes (for the steam vents). This year, I used a Christmas tree cookie cutter. Gently placed the top onto the pie, pinched the edges to seal, and brushed it with a wash of 1 egg yolk and a tsp of water.
I baked my pies (2 at a time) in the bottom third of my oven, at 400, for about 30 minutes.
Remove them, allow them to cool, and wrap in foil. I usually throw them back in the pie shell boxes to store in the freezer.
To reheat, either cut a slice and pop in the microwave (blech!) or pop the thawed pie in the oven, foil still on it (so you don't burn the crust) at 350 for about 20 to 30 minutes, until heated through. You can pull the foil off for the last few minutes to crisp up the crust.
Don likes to eat his with ketchup and yellow mustard, my Mom likes to eat hers smothered in HP sauce (steak sauce).
I think this is the one.
I made four, so divide the measurements as needed. I cooked it all up in a stock pot (browning the meat in a couple of batches in a frying pan). If you are making one pie, you could do it all in a frying pan, I'm sure. If you don't want to do the math, they freeze really well, and are great "cozy food" for those cold winter nights.
I also used all beef this time, but you could use a combination of ground meats (beef, pork, veal, venison, moose)
6 medium russet potatoes, peeled and cubed
3 large yellow onions
30 or so crimini mushrooms
3 stalks celery
1 family size package of ground beef (just under 2 kg)
4 cups beef stock (1 tetra pack)
8 cloves garlic
3 stalks fresh thyme
1 tsp ground cloves
1 tsp ground cinnamon
4 bay leaves
1 tablespoon honey (or sugar)
Salt and pepper
1 egg yolk
Boil potatoes in salted water until tender. Drain and mash. Set aside. You don't really need to add cream or butter, because it's going to be used a binding agent and will soak up all the gravy. Having said that, I did add a little milk to make it easier to mash, and seasoned with salt and pepper to taste.
I chose to chop up my veggies in a food processor because I didn't want chunks of veggies, but I did want the flavour. If you would rather dice your veggies by hand, go nuts. It's your pie.
Chop mushrooms, celery, and onions and soften in a stock pot with a little bit of olive oil. At this point, I was also browning the ground beef in a frying pan. Add stock, garlic, honey, thyme (if you have fresh thyme, just throw the whole twig in...the little leaves will come off and all you'll need to do is remove the stalk), cloves, cinnamon and bay leaf. When meat is browned, drain and add to the stock pot with everything else (except the potatoes). Simmer for a while until stock is reduced (you don't want it too soupy, but you don't want it too dry...how's that for vague?). Remove bay leaves and thyme stalks. Taste for seasoning and adjust with salt and pepper.
Mix in potatoes, spoonful by spoonful, until it's a good consistency. I didn't need to use all my mashed potatoes, maybe had 1/2 cup leftover, but next time it could be a different story.
I used premade pie shells (the TenderFlake deep dish dealies), so if you make your own pastry, do what you do. I use two premade pie shells per pie (one for the bottom and one for the top) and because there was one year the bottom crust was still a little soggy, I took my Mother in Law's advice, and prebaked the bottoms before filling.
So, I put the oven on 400, pierced 4 shells with a fork, and popped them in the oven for a few minutes, until the bottoms were dry (but not completely done). Once they were done, I filled them full of filling.
I tipped one of the unbaked and thawed pastry shells onto the counter and cut out shapes (for the steam vents). This year, I used a Christmas tree cookie cutter. Gently placed the top onto the pie, pinched the edges to seal, and brushed it with a wash of 1 egg yolk and a tsp of water.
I baked my pies (2 at a time) in the bottom third of my oven, at 400, for about 30 minutes.
Remove them, allow them to cool, and wrap in foil. I usually throw them back in the pie shell boxes to store in the freezer.
To reheat, either cut a slice and pop in the microwave (blech!) or pop the thawed pie in the oven, foil still on it (so you don't burn the crust) at 350 for about 20 to 30 minutes, until heated through. You can pull the foil off for the last few minutes to crisp up the crust.
Don likes to eat his with ketchup and yellow mustard, my Mom likes to eat hers smothered in HP sauce (steak sauce).
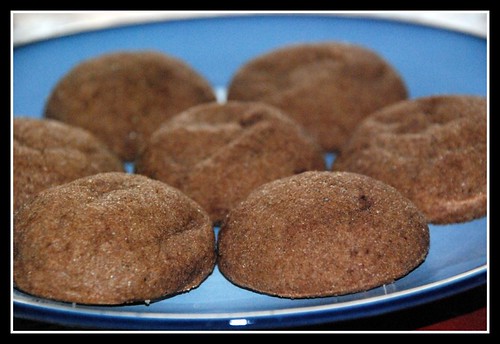
Chai Chocodoodles
I saw a woman on Good Morning America making these and they sounded so good! I like chocolate, I love chai, and I like snickerdoodles, so why not give them a try?
The original recipie can be found here, and I only made one adjustment. I didn't see any salt in the ingredients, so I added that.
2 1/4 cups sugar
1 teaspoon ground cinnamon
1 teaspoon ground ginger
1 teaspoon ground cardamom
1/2 teaspoon ground allspice
1/2 teaspoon white pepper
1/2 cup unsweetened cocoa powder
1 cup unsalted butter, softened
2 eggs
2 teaspoons vanilla extract
2 1/4 cups flour
1 1/2 teaspoons baking powder
1/4 tsp salt
Preheat oven to 350 and pop a silpat on your baking sheet (or parchment).
In a medium bowl, combine sugar, cinnamon, ginger, cardamom, allspice and white pepper. Remove 1/2 cup of this mixture and place in a shallow bowl and put aside. Add cocoa powder to the bowl with the remaining sugar mixture and combine.
In a large bowl, cream butter until fluffy, add spiced cocoa mixture and beat until combined. Mix in eggs and vanilla. Add flour, baking powder and salt, and mix at low speed until just combined.
As usual, don't overmix.
Using a small cookie scoop, form balls and roll in the sugar and spice mixture you put in a shallow bowl earlier, and place on your baking sheet. Bake for 12-15 minutes.
I am not sure how many this makes, but if I remember, I might be able to come back and jot it down. The original recipe says "4 servings" but seriously, how much is a serving of delicious cookies?
I immediately made 16, and while they were baking, continued to roll the dough into balls and coating with sugar, and placed them on a piece of parchment in my freezer. Once all the balls were individually frozen, I popped them into freezer bags and put them in the freezer. Individually freezing them will mean I won't have a giant glob of dough to contend with. When I'm ready to bake them, I'll pull out what I need, let them thaw which won't take long at all, and pop them in the oven.
Why would I do that? Well, a couple of reasons.
First, you never know when you're going to be invited at the last minute (or remember at the last minute) to someone's house, and you should never go empty handed. In 20 minutes, you can have homemade cookies.
Second, if you're like me and plan to make a few different types of cookies but have a full day with your other responsibilities, making a batch of dough and getting it ready when you have the chance (say, the weekend before), takes a little stress off. I don't like making cookies a week in advance, so this is my compromise.
I may look like I'm all discombobulated, but this girl has a plan!
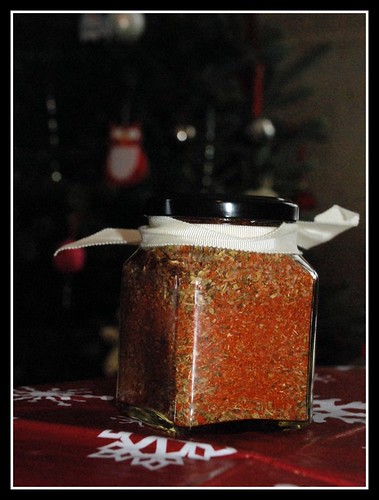
Spice Rub
I made an all purpose spice rub for my Dad. He loves to cook and experiment with flavours. It was a quick and easy gift, and I'm sure he'll find some awesome things to do with it (besides putting it on chicken or sprinkling it on freshly popped popcorn).
1/3 cup course sea salt
1/4 cup smoked paprika
1/4 demerera sugar
2 tablespoons freshly ground black pepper
2 tablespoons dried oregano
1 tablespoon cayenne pepper
Place in a jar and shake well.
1/3 cup course sea salt
1/4 cup smoked paprika
1/4 demerera sugar
2 tablespoons freshly ground black pepper
2 tablespoons dried oregano
1 tablespoon cayenne pepper
Place in a jar and shake well.
Friday, December 17, 2010
Salmon, Hodgepodge, and Cheddar Dill Crackers
Hodgepodge
Hodgepodge is basically a bunch of veggies, covered in a white sauce. It's not hard to do. Boil a few potatoes and carrots until almost done, throw in broccoli and peas and cook about 3 more minutes. Drain and put pot back on the stove.
Add 2 tblsp butter, chopped onions, and thyme to soften. Grate in a clove of garlic and sprinkle in 2 tblsp flour and cook a minute or two to cook out the raw flour taste. Slowly add 1 cup hot milk, whisking to incorporate, toss in a tablespoon of dijon mustard, salt and pepper to taste, and allow to thicken (stir often!).
Throw cooked veggies into the pot and coat with sauce. When ready to serve, sprinkle with a little fresh herbs (dill was great!).
Crackers are easy to make, and can be flavoured however you like.
Cheddar Dill Crackers
1 cup all purpose flour
1/2 cup parmesan cheese, finely shredded
1/4 cup shredded cheddar
1/2 cup butter (cold or frozen, depending on your method)
2 tablespoons milk
1 tablespoon fresh dill
1/2 teaspoon granulated garlic
1/4 teaspoon sea salt
1/2 teaspoon fresh ground pepper
Set oven to 350 degrees.
There are two ways to do this: You can make it in a food processor, or you can make it in a bowl with frozen butter. The latter will result in much flakier and more tender crackers. Your choice though...
Combine flour, cheeses, dill (or your choice of herb), garlic, salt and pepper. In a bowl, combine 1 cup flour, seasonings, and cheese. If using the food pro, cut cold butter into small cubes and pulse just until contents of the bowl resemble course cornmeal. Don't overwork it.
If you're using the frozen butter technique, grate frozen butter into dry stuff and gently stir to combine.
For either method, now add milk, a bit at a time (I needed a little more than 2 tblsp) until dough forms a ball. Use flour as needed to keep things from sticking.
Roll out to about 1/4" thickness (more if you like a more biscuit type deal, less if you like crispy goodness). Cut into even shapes (squares, triangles, whatever, but make them around the same size for even cooking). Pop onto a silpat (or parchment, or lightly greased) covered baking sheet and slide into the oven for about 15 minutes or until lightly golden.
They will crisp up as they cool.
Salmon
I did a nice and easy salmon last night...rinsed and dried the filets, sprinkled with salt and pepper, and pan fried in a hot pan with olive oil until just done. I added a squirt of a balsamic glaze at the last minute for a little kick.
Friday, November 5, 2010
They Say It's Your Birthday...
I'm still around :), we've had a lot going on. I assure you, I'm still cooking up a storm!
It was Quinn's second birthday on Wednesday, so we're having our family get together tomorrow. I'm trying to get as much done now as I can, so I can focus on those inevitable last minute details (or early guests) tomorrow.
What's on the menu? Thanks to some incredible contributions from my friends, and some incredible foodies on LSG and the Desert Garden Farms group, I can't wait to dig into the layout this year!
- Meatballs in the crockpot with Diana Sauce (a sweet BBQ sauce to those who don't know what that is)
- Veggie Pizza (crescent roll crust, cream cheeese and veg soup mix, finely chopped veggies on top)
- Buffalo Chicken Dip (I'm DYING to try this)
- Tzatziki, Roasted Red Pepper dip, Hummus, possibly some Tapenade
- Assorted olives (that my Father picks up at an incredible deli)
- Possibly some cheese
- Assortment of crackers, toasted pita wedges, pretzels
- Carrots, celery, peppers, radishes
- Chips, onion dip, dill pickle dip
And for dessert, a chocolate cake, carrot cake, and lemon raspberry bars
Hopefully something for everyone.
I am a firm believer in finishing as much ahead of time as I can. I poached a chicken breast along with the chicken we ate last night for the Buffalo Chicken Dip, as well as completing the lemon raspberry bars (the trick now is NOT eating them all before the party).
Today, I've mixed the cream cheese and soup mix for the veggie pizza, chopped the veggies for said pizza, and am currently baking the carrot cake. Later tonight I'll bake the chocolate cake and the crust for the veggie pizza.
That will leave chopping veggies for crudites, assembling the veggie pizza, making the Buffalo Chicken Dip, throw the meatballs and bottled sauce in the crockpot, and lay everything out. I'll probably try to get a little balloon bouquet (it's a superhero theme) and put up the birthday decorations...oh and decorate Quinn's cake.
And if there is one thing that I would consider a lifesaver when you're hosting a party is to run the dishwasher before everyone arrives, and make sure it's empty for the party. That way you have all your dishes available, and as stuff gets dirty, you can tuck it away, saving you clean up time in the end.
That's the part I hate most :)
Friday, October 15, 2010
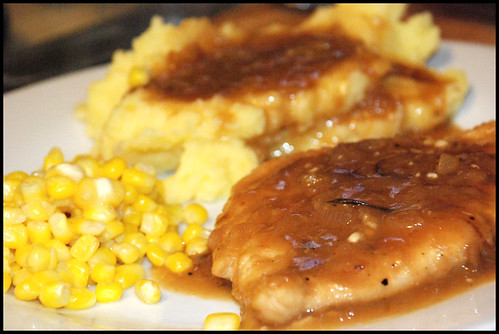
Apple Cider Chicken
I've talked about how easy it is to make things up on the fly if you know what tastes good together, and this is an example of an "off the cuff" meal.
I'd planned to have chicken parm with spaghetti, but I just wasn't feeling like cooking that. We have a bit of stress in our lives at the moment, and it's very easy to fall down the, "I just don't feel like cooking, let's get fast food instead" slope. That isn't good for anyone.
I love the "chicken marsala" I make, but I didn't have any marsala wine or mushrooms. What I did have were some shallots, and some apple cider that needed to be used up. I threw some potatoes on to boil, and set to work on the chicken. This served 2 and Quinn.
Apple Cider Chicken
2 boneless chicken breasts
A bit of flour
Salt and pepper
Oil
4 shallots, sliced
About 2 cups apple cider
About 1 cup chicken stock
Sprig of rosemary
1 tblsp cold butter
Put frying pan on to heat to about medium. Rinse, pat dry and pound chicken breasts to about 1/2" thick.
Put about 2 tblsp of oil into the pan and toss in sliced shallots to soften. Meanwhile, season a few tablespoons of flour with salt and pepper and lightly dredge chicken breasts and place in pan. Cook a few minutes until done on one side, and flip.
Once chicken is cooked through, add cider and chicken stock and boost heat to high.
At this point, after tasting the sauce, I thought it might need a little something more. Apples and rosemary go well together, so I went out and grabbed a sprig of rosemary and tossed it in to infuse the sauce with its flavour.

After about 5 minutes of boiling, I removed the sprig, and put the chicken breasts on a plate, allowing the sauce to reduce further. Make sure to taste and adjust for seasons. After about 3 minutes, remove from heat and put 1 tblsp butter in pan, swirling until butter is melted (this will make the sauce richer).
I served this with riced potatoes and corn kernels.
This was a great experiment. I will DEFINITELY make this one again! This would be great with pork too!
I'd planned to have chicken parm with spaghetti, but I just wasn't feeling like cooking that. We have a bit of stress in our lives at the moment, and it's very easy to fall down the, "I just don't feel like cooking, let's get fast food instead" slope. That isn't good for anyone.
I love the "chicken marsala" I make, but I didn't have any marsala wine or mushrooms. What I did have were some shallots, and some apple cider that needed to be used up. I threw some potatoes on to boil, and set to work on the chicken. This served 2 and Quinn.
Apple Cider Chicken
2 boneless chicken breasts
A bit of flour
Salt and pepper
Oil
4 shallots, sliced
About 2 cups apple cider
About 1 cup chicken stock
Sprig of rosemary
1 tblsp cold butter
Put frying pan on to heat to about medium. Rinse, pat dry and pound chicken breasts to about 1/2" thick.
Put about 2 tblsp of oil into the pan and toss in sliced shallots to soften. Meanwhile, season a few tablespoons of flour with salt and pepper and lightly dredge chicken breasts and place in pan. Cook a few minutes until done on one side, and flip.
Once chicken is cooked through, add cider and chicken stock and boost heat to high.
At this point, after tasting the sauce, I thought it might need a little something more. Apples and rosemary go well together, so I went out and grabbed a sprig of rosemary and tossed it in to infuse the sauce with its flavour.
After about 5 minutes of boiling, I removed the sprig, and put the chicken breasts on a plate, allowing the sauce to reduce further. Make sure to taste and adjust for seasons. After about 3 minutes, remove from heat and put 1 tblsp butter in pan, swirling until butter is melted (this will make the sauce richer).
I served this with riced potatoes and corn kernels.
This was a great experiment. I will DEFINITELY make this one again! This would be great with pork too!
Sunday, October 10, 2010
It's Fall! What to Do With the Herbs?
My basil, thyme and rosemary grew awesomely this summer, but what to do now that it's getting cold?
The thyme is actually pretty hardy, so I will leave that out all winter and cut it back once it warms up again. The rosemary may or may not survive the winter, and I know the basil won't...so I started freezing what was out there.
I do have a few stalks of dried basil, but it's just not the same...those dry, shrivelled, brown leaves in my food? No thanks.
I stripped a bunch of basil leaves, chopped them in the food processor coarsely, and popped about a tablespoon in each compartment of an ice cube tray. I filled them up half way with water (until the leaves were just barely covered) and put them in the freezer.
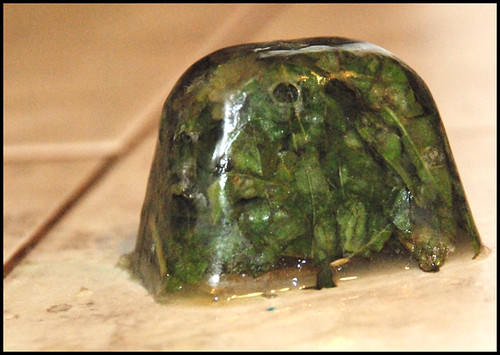
Once those were set, I put a little more water on top to completely cover, and finished the freezing process. Otherwise, the leaves float to the top and a bunch of them will be exposed and discolour. See what I did there?
I popped the cubes into a couple of freezer bags, labelled, of course (because, no matter how well you think you're going to remember, you won't), and when I need a tablespoon of fresh basil, I throw a cube into the pot and I'm good to go!

The thyme is actually pretty hardy, so I will leave that out all winter and cut it back once it warms up again. The rosemary may or may not survive the winter, and I know the basil won't...so I started freezing what was out there.
I do have a few stalks of dried basil, but it's just not the same...those dry, shrivelled, brown leaves in my food? No thanks.
I stripped a bunch of basil leaves, chopped them in the food processor coarsely, and popped about a tablespoon in each compartment of an ice cube tray. I filled them up half way with water (until the leaves were just barely covered) and put them in the freezer.
Once those were set, I put a little more water on top to completely cover, and finished the freezing process. Otherwise, the leaves float to the top and a bunch of them will be exposed and discolour. See what I did there?
I popped the cubes into a couple of freezer bags, labelled, of course (because, no matter how well you think you're going to remember, you won't), and when I need a tablespoon of fresh basil, I throw a cube into the pot and I'm good to go!
Thanksgiving Dinner
Sorry it's been so long since I've updated. I have a little bit of time, and a lot of catching up to do! Here's the first of them.
It's the Canadian Thanksgiving this weekend...well, officially, the holiday is Monday but most people I know do dinner on the Sunday and spend Monday recovering.
Don has been away a lot in the past couple of weeks, so I wanted to have a bit of a celebratory dinner to welcome him back, on Friday.
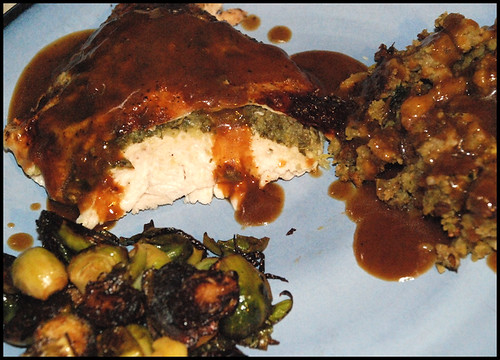
I made turkey breast, stuffing, and brussels sprouts...and for dessert, a pumpkin pie.
The turkey and stuff are adapted from Rachel Ray's Thanksgiving in 60.
Turkey Breast
I prefer to have a boneless turkey breast (because it is so much easier to cut). If you can't find a boneless turkey breast, see if the butcher will debone it for you, or just take it home and do it yourself...it's not that hard, and if you don't know what you're doing, check the internet. I'm sure there are plenty of sites that can help you out. Also, this is the one time I won't put foil on the bottom of the roasting pan because you'll need the bits at the bottom to make a gravy.
1 small onion, chopped
1 lemon (for zesting)
12 fresh sage leaves
1/2 cup flat leaf parsley
1 teaspoon salt
Olive oil
4 tablespoons butter
2 boneless turkey breast halves (skin on)
Freshly ground pepper
3 tablespoons flour
2 cups apple cider
1/2 cup chicken stock
Salt and pepper
Preheat oven to 450. Oil roasting pan and put aside.
Using a food processer, chop onion and lemon zest (avoid the pith, but I'm sure I don't need to tell you that) until fine. Add sage, parsley, olive oil and a pinch of salt and pulse until a course paste.
Melt butter in a small saucepan on the stove. The original recipe also recommends adding 2 fresh bay leaves to this butter and letting the oil infuse, which is very tasty...but I could find neither fresh bay at the market nor my dried ones at home, so I left them out this time. Once melted, pull off heat.
Place turkey breasts on a work surface and carefully run fingers between flesh and skin to create a pocket. Don't yank it completely off...you're going to stuff the paste you made in the food processor under the skin so you don't want it to fall out. Once you've loosened the skin, get to stuffing (using half on each breast, obviously).
Pop the turkey breasts into the roasting pan, giving them a little room to breathe, and brush the turkey skin with half the butter you melted. Sprinkle with salt and pepper, and place in the oven. Close the door and decrease the temp to 400 degrees.
Wash your hands. Not that I need to tell you that. You just handled poultry.
After 20 minutes, baste the turkey breasts with the remaining butter and pop back into the oven for about 25 minutes until cooked through. The thermometer should read 170 (but I prefer 180 tbh...it wasn't quite done, but the skin was starting to get dark so I covered the pan with foil so the meat could cook through - our oven is a jerk).
Once cooked, remove the turkey breast and let it rest for 10 minutes. This gives you time to make the gravy. At this point, timing wise, you should put the stuffing in the oven to brown (see below).
Put the roasting pan on the oven and turn the element on to heat the pan. Sprinkle flour over the pan and cook while stirring for a few minutes. Add the chicken stock and whisk until smooth, then slowly add the apple cider, continuing to whisk to avoid lumps. Continue heating gravy, stirring occasionally, until thickened. Taste, and season with salt and pepper.
Slice turkey breast and serve with gravy.
Apple Stuffing
2 tablespoons olive oil
4 tablespoons butter
4 ribs celery, chopped
1 medium yellow onion, chopped
3 Royal Gala apples (or whatever you have on hand), peeled, cored, and chopped
Salt and pepper
2 tablespoons poultry seasoning
1/4 cup fresh parsley leaves chopped
8 cups cubed stuffing mix (I used the Paxo, which is more crumby than cubed and that worked fine, but I love the cubey stuff better, for texture)
2 cups chicken stock
1 cup apple cider
Preheat a large skillet over medium high heat...I used my cast iron, because I popped it in the oven to crisp the top. If you don't have a large skillet you can put in the oven, just use a frying pan for the first bit, and finish it off in a baking pan or casserole. The original recipe made muffins. I was too lazy to get out my muffin tin.
Add olive oil and butter to heated skillet. Add chopped onion and celery and cook until softened. Add apples, salt, pepper, and poultry seasoning, and cook another few minutes. Add parsley and stuffing cubes, and toss together to combine. Moisten stuffing with chicken stock and apple cider (you might need to adjust the measures so it's soft but not soggy)
Pop the lot into the oven while the turkey is resting (and you're making gravy) until the top is crispy and browned.
Serve with gravy on top.
Pumpkin Pie
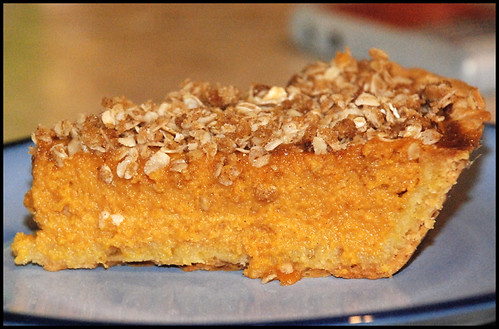
I followed the directions on the can of pumpkin puree, adjusting it to be not as sweet, and cooked it. I mixed together the topping I use for my apple crisp (oats, flour, brown sugar, cinnamon, and a little salt, mixed with melted butter) and sprinkled it on top.
While we ate our dinner, I popped the pie in the oven to toast the topping and warm the pie.
It's the Canadian Thanksgiving this weekend...well, officially, the holiday is Monday but most people I know do dinner on the Sunday and spend Monday recovering.
Don has been away a lot in the past couple of weeks, so I wanted to have a bit of a celebratory dinner to welcome him back, on Friday.
I made turkey breast, stuffing, and brussels sprouts...and for dessert, a pumpkin pie.
The turkey and stuff are adapted from Rachel Ray's Thanksgiving in 60.
Turkey Breast
I prefer to have a boneless turkey breast (because it is so much easier to cut). If you can't find a boneless turkey breast, see if the butcher will debone it for you, or just take it home and do it yourself...it's not that hard, and if you don't know what you're doing, check the internet. I'm sure there are plenty of sites that can help you out. Also, this is the one time I won't put foil on the bottom of the roasting pan because you'll need the bits at the bottom to make a gravy.
1 small onion, chopped
1 lemon (for zesting)
12 fresh sage leaves
1/2 cup flat leaf parsley
1 teaspoon salt
Olive oil
4 tablespoons butter
2 boneless turkey breast halves (skin on)
Freshly ground pepper
3 tablespoons flour
2 cups apple cider
1/2 cup chicken stock
Salt and pepper
Preheat oven to 450. Oil roasting pan and put aside.
Using a food processer, chop onion and lemon zest (avoid the pith, but I'm sure I don't need to tell you that) until fine. Add sage, parsley, olive oil and a pinch of salt and pulse until a course paste.
Melt butter in a small saucepan on the stove. The original recipe also recommends adding 2 fresh bay leaves to this butter and letting the oil infuse, which is very tasty...but I could find neither fresh bay at the market nor my dried ones at home, so I left them out this time. Once melted, pull off heat.
Place turkey breasts on a work surface and carefully run fingers between flesh and skin to create a pocket. Don't yank it completely off...you're going to stuff the paste you made in the food processor under the skin so you don't want it to fall out. Once you've loosened the skin, get to stuffing (using half on each breast, obviously).
Pop the turkey breasts into the roasting pan, giving them a little room to breathe, and brush the turkey skin with half the butter you melted. Sprinkle with salt and pepper, and place in the oven. Close the door and decrease the temp to 400 degrees.
Wash your hands. Not that I need to tell you that. You just handled poultry.
After 20 minutes, baste the turkey breasts with the remaining butter and pop back into the oven for about 25 minutes until cooked through. The thermometer should read 170 (but I prefer 180 tbh...it wasn't quite done, but the skin was starting to get dark so I covered the pan with foil so the meat could cook through - our oven is a jerk).
Once cooked, remove the turkey breast and let it rest for 10 minutes. This gives you time to make the gravy. At this point, timing wise, you should put the stuffing in the oven to brown (see below).
Put the roasting pan on the oven and turn the element on to heat the pan. Sprinkle flour over the pan and cook while stirring for a few minutes. Add the chicken stock and whisk until smooth, then slowly add the apple cider, continuing to whisk to avoid lumps. Continue heating gravy, stirring occasionally, until thickened. Taste, and season with salt and pepper.
Slice turkey breast and serve with gravy.
Apple Stuffing
2 tablespoons olive oil
4 tablespoons butter
4 ribs celery, chopped
1 medium yellow onion, chopped
3 Royal Gala apples (or whatever you have on hand), peeled, cored, and chopped
Salt and pepper
2 tablespoons poultry seasoning
1/4 cup fresh parsley leaves chopped
8 cups cubed stuffing mix (I used the Paxo, which is more crumby than cubed and that worked fine, but I love the cubey stuff better, for texture)
2 cups chicken stock
1 cup apple cider
Preheat a large skillet over medium high heat...I used my cast iron, because I popped it in the oven to crisp the top. If you don't have a large skillet you can put in the oven, just use a frying pan for the first bit, and finish it off in a baking pan or casserole. The original recipe made muffins. I was too lazy to get out my muffin tin.
Add olive oil and butter to heated skillet. Add chopped onion and celery and cook until softened. Add apples, salt, pepper, and poultry seasoning, and cook another few minutes. Add parsley and stuffing cubes, and toss together to combine. Moisten stuffing with chicken stock and apple cider (you might need to adjust the measures so it's soft but not soggy)
Pop the lot into the oven while the turkey is resting (and you're making gravy) until the top is crispy and browned.
Serve with gravy on top.
Pumpkin Pie
I followed the directions on the can of pumpkin puree, adjusting it to be not as sweet, and cooked it. I mixed together the topping I use for my apple crisp (oats, flour, brown sugar, cinnamon, and a little salt, mixed with melted butter) and sprinkled it on top.
While we ate our dinner, I popped the pie in the oven to toast the topping and warm the pie.
Monday, September 27, 2010
Frozen Butter Biscuits
My friend Stacy asked what I put my apple butter on, and I went through a list of things, but totally failed to mention my favourite thing to top with apple butter...

The trick to these fluffy, tender (but with a crispy outside) biscuits is using frozen butter, and not overworking the dough.
The science behind this, as explained by Chef Michael Smith, is that frozen butter gets into the layers of the dough and as it heats up in the 400 degree oven, the little bits of butter release steam, which creates flaky layers. Grating the butter in, is not only fast and easy, but it allows for less working of the butter (let's face it, cutting butter into pastry sucks, and the food processor may heat it up a bit), and the small pieces mean more poofy little flaky parts.
This hint would work with any flaky pastry, like pie crust. You can thank me by sending me baked goods. Thanks.
I took Chef Smith's recipe for Frozen Butter Buscuits and halved it. I didn't modify it at all (not that there was much to modify)...truth is, it's perfect the way it is! (I didn't add salt and pepper to the top because it was for breakfast, but if I make these at dinner, I do)
One of the most awesome things about this recipe, besides how easy and delicious they are, is that it takes about 20 minutes from start to finsh (as long as you planned ahead and put the butter in the freezer).
Frozen Butter Biscuits
2 cups all purpose flour
1 tablespoon baking powder
1 teaspoon salt
1 stick frozen butter
3/4 cup milk
Preheat oven to 400 degrees.
Whisk flour, baking powder and salt into a bowl. Grate in frozen butter (I cut the stick in half and grate one at a time, leaving the other in the freezer). Toss gently until butter is evenly distributed amongst the dry mixture.
Using the handle of a wooden spoon (it's gentler), mix while pouring milk into the bowl, until dough ball begins to form. Add another tablespoon or two of milk to gather up the dry bits if there are some, and fold to make sure everything is combined.
Make a flat disk on a lightly floured counter and cut into wedges (or whatever) and place on baking sheet. Bake 15 minutes, until golden brown, and serve warm.
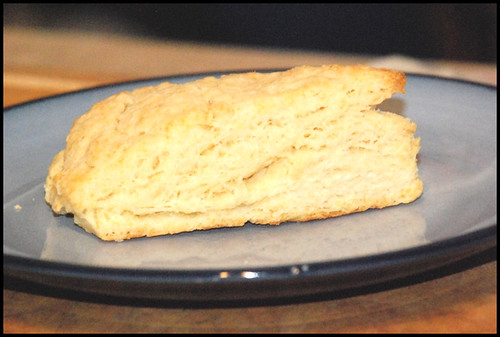
(No photo would show how tender, flaky and delcious this biscuit was)
The trick to these fluffy, tender (but with a crispy outside) biscuits is using frozen butter, and not overworking the dough.
The science behind this, as explained by Chef Michael Smith, is that frozen butter gets into the layers of the dough and as it heats up in the 400 degree oven, the little bits of butter release steam, which creates flaky layers. Grating the butter in, is not only fast and easy, but it allows for less working of the butter (let's face it, cutting butter into pastry sucks, and the food processor may heat it up a bit), and the small pieces mean more poofy little flaky parts.
This hint would work with any flaky pastry, like pie crust. You can thank me by sending me baked goods. Thanks.
I took Chef Smith's recipe for Frozen Butter Buscuits and halved it. I didn't modify it at all (not that there was much to modify)...truth is, it's perfect the way it is! (I didn't add salt and pepper to the top because it was for breakfast, but if I make these at dinner, I do)
One of the most awesome things about this recipe, besides how easy and delicious they are, is that it takes about 20 minutes from start to finsh (as long as you planned ahead and put the butter in the freezer).
Frozen Butter Biscuits
2 cups all purpose flour
1 tablespoon baking powder
1 teaspoon salt
1 stick frozen butter
3/4 cup milk
Preheat oven to 400 degrees.
Whisk flour, baking powder and salt into a bowl. Grate in frozen butter (I cut the stick in half and grate one at a time, leaving the other in the freezer). Toss gently until butter is evenly distributed amongst the dry mixture.
Using the handle of a wooden spoon (it's gentler), mix while pouring milk into the bowl, until dough ball begins to form. Add another tablespoon or two of milk to gather up the dry bits if there are some, and fold to make sure everything is combined.
Make a flat disk on a lightly floured counter and cut into wedges (or whatever) and place on baking sheet. Bake 15 minutes, until golden brown, and serve warm.
(No photo would show how tender, flaky and delcious this biscuit was)
Friday, September 24, 2010
Apple Butter
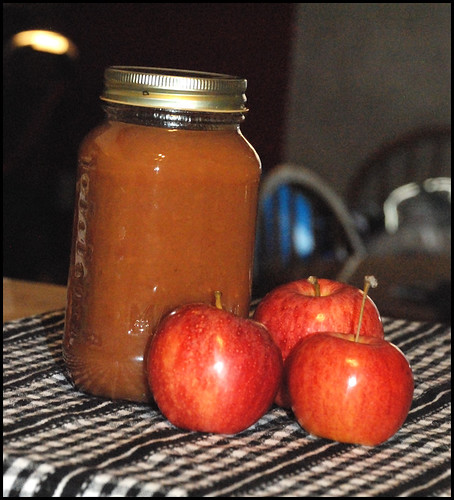
We have lots of apples :)
My aunt and uncle have an orchard in Windsor, so I'm no stranger to apple recipes. You may see a few more while I whittle down the stash we picked up at Wagner Orchards.
This is a Michael Smith recipe...
Apple Butter
10 apples, cored and cut in quarters (I left the skins on)
1/2 to 1 cup brown sugar (to your taste)
1/2 cup apple cider
1/2 tsp cinnamon
1 tsp vanilla
Pop it on the stove, cover, and cook on medium high heat until apples break down and the pulp is thick and dark brown.
Puree with an immersion blender (or a traditional blender), put in a jar, and refrigerate.
I cooked it for about 3 hours on the stovetop. It could have been cooked down a little longer to make it thicker. I usually make it in the crock pot, but mine was in the dishwasher :)
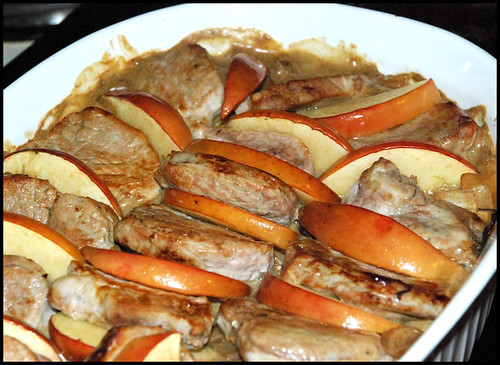
Harvest Pork and Apple Bake
Campbell's (you know, the soup company?) has a ton of great recipes. How easy is throwing some rice, veggies, meat and soup into a casserole and baking it?
I found a recipe in a magazine for Harvest Pork and Apple Bake and made it up last night. As usual, I fiddled with it a smidge.
Recently, I talked about how blending flavours is easy if you know what tastes good together. Thanks to the Brady Bunch, we all know pork chops and applesauce work good together, so apples and pork tenderloin will be great, with the apple flavour strengthened through apple cider.
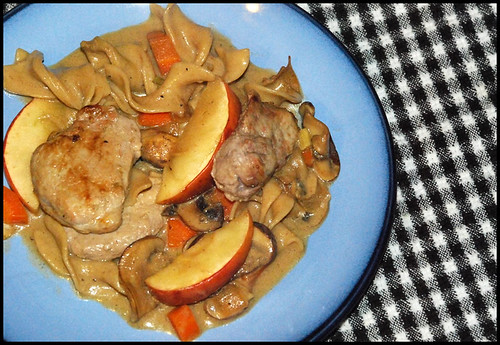
Harvest Pork and Apple Bake
2 cups whole wheat yolkless broad egg noodles
1 carrot, peeled, quartered, and chopped
2 tablespoons oil
1 lb pork tenderloin, cut into 1/2" medallions
2 cups crimini mushrooms, sliced
1 small onion, sliced
1 can cream of celery soup (cream of mushroom or chicken would also work...and I bet cream of cheddar would be good too!)
1 cup apple cider
3 sprigs fresh thyme
1/2 tsp cinnamon
salt and pepper
1 red apple, unpeeled, cored and cut into wedges
Cook noodles and carrots in boiling, salted water until noodles are al dente.
Meanwhile, brown tenderloin medallions in a frying pan with a little oil (about 4 mins each side). I talked about browning meat before putting in the crock pot yesterday...same goes here. Brown the pork and give it a little caramelized flavour and it will make your dish extra delicious. Once cooked, put pork on a plate and put aside.
In the bottom of that frying pan is a delicious bunch of gunk created by caramelized sugars and proteins from the pork and it's going to help flavour the rest of your dish. Toss in the onions and mushrooms and cook on medium high heat until they are soft.
Turn up the heat, add apple cider to mushrooms and onions and deglaze anything left on the bottom of the pan that the mushrooms didn't pick up. Reduce cider, stirring frequently, for a few minutes (this will concentrate the flavours and thicken things up a bit).
Preheat oven to 350.
Turn heat down to medium and add soup, thyme sprigs (just throw them in whole...remember how many go in so you know how many twigs need to come out!) and cinnamon.
Toss drained noodles and carrots into sauce and stir to combine. Taste and add salt and pepper as needed.
Toss noodles, sauce and vegetable mixture into a 1 1/2 quart casserole (I used my oval shaped one over the round one so there's more room for the pork and apples on top, but use what you have!)
Arrange pork and apples on top (see photo above) and bake for 30 minutes, uncovered.
I found a recipe in a magazine for Harvest Pork and Apple Bake and made it up last night. As usual, I fiddled with it a smidge.
Recently, I talked about how blending flavours is easy if you know what tastes good together. Thanks to the Brady Bunch, we all know pork chops and applesauce work good together, so apples and pork tenderloin will be great, with the apple flavour strengthened through apple cider.
Harvest Pork and Apple Bake
2 cups whole wheat yolkless broad egg noodles
1 carrot, peeled, quartered, and chopped
2 tablespoons oil
1 lb pork tenderloin, cut into 1/2" medallions
2 cups crimini mushrooms, sliced
1 small onion, sliced
1 can cream of celery soup (cream of mushroom or chicken would also work...and I bet cream of cheddar would be good too!)
1 cup apple cider
3 sprigs fresh thyme
1/2 tsp cinnamon
salt and pepper
1 red apple, unpeeled, cored and cut into wedges
Cook noodles and carrots in boiling, salted water until noodles are al dente.
Meanwhile, brown tenderloin medallions in a frying pan with a little oil (about 4 mins each side). I talked about browning meat before putting in the crock pot yesterday...same goes here. Brown the pork and give it a little caramelized flavour and it will make your dish extra delicious. Once cooked, put pork on a plate and put aside.
In the bottom of that frying pan is a delicious bunch of gunk created by caramelized sugars and proteins from the pork and it's going to help flavour the rest of your dish. Toss in the onions and mushrooms and cook on medium high heat until they are soft.
Turn up the heat, add apple cider to mushrooms and onions and deglaze anything left on the bottom of the pan that the mushrooms didn't pick up. Reduce cider, stirring frequently, for a few minutes (this will concentrate the flavours and thicken things up a bit).
Preheat oven to 350.
Turn heat down to medium and add soup, thyme sprigs (just throw them in whole...remember how many go in so you know how many twigs need to come out!) and cinnamon.
Toss drained noodles and carrots into sauce and stir to combine. Taste and add salt and pepper as needed.
Toss noodles, sauce and vegetable mixture into a 1 1/2 quart casserole (I used my oval shaped one over the round one so there's more room for the pork and apples on top, but use what you have!)
Arrange pork and apples on top (see photo above) and bake for 30 minutes, uncovered.
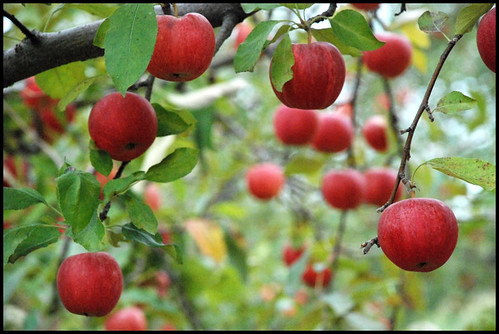
Apple Picking!
We went apple picking last Saturday. It had been YEARS since I'd been.
Having a very active nearly 2 year old, we're always looking for things to do as a family that gets him out and active, and what better excuse in September than going apple picking? He loves apples, so it also serves as a little lesson in where his food comes from.
Wagner Orchards and Estate Winery was recommended to us by a friend.
It was perfect for us! Not ridiculously busy, equipment for Quinn to play on, apples (of course), a winery, and some good eats. I also love that it's family owned and run.
We bought a bag at the shop ($10 for a 13-15lb bag) and hopped onto the tractor's trailer. The tractor took us to the Gala section of the orchard and we walked back, picking as we went.

Quinn loved picking the apples (there were plenty of branches low enough for him), and tried to eat each and every one. We wandered down the path, filling our bag with delicious apples (they use very few chemicals and try to use natural pest control over insecticides, when possible).
We wandered over the barn where Quinn talked to the cows.
Wagner's also sells beef that's hormone and antibiotic free. They are pasture-raised (but are finished on corn...that they grow themselves).
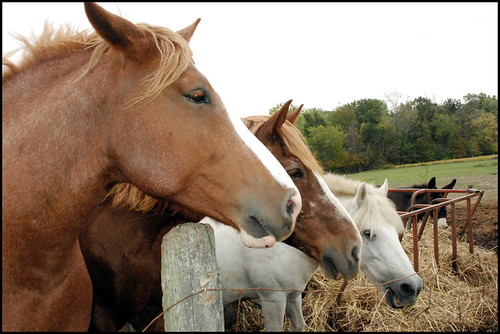
We walked across the grass to visit with the horses and donkey.
We started back toward the buildings and "accidentally" wandered in through the winery door. There were a number of wines to choose from, but I was drawn to the ice fruit wines and picked up a bottle of the raspberry (they also had apple and blackcurrant, as well as some ice fruit wines blended with red), then followed my nose into the main shop.
There, I was tempted by some pies, strudels, sausage rolls, homemade Mennonite sausage...I wanted to tell them to just hand me a fork and put it on my tab, but I was good and only purchased some ground beef ($3.50 a lb - I made Lazy Cabbage Rolls with some of the beef and it was incredible!), a couple of strudels and some apple cider.
We went back outside and let Quinn loose on the the jungle gym!
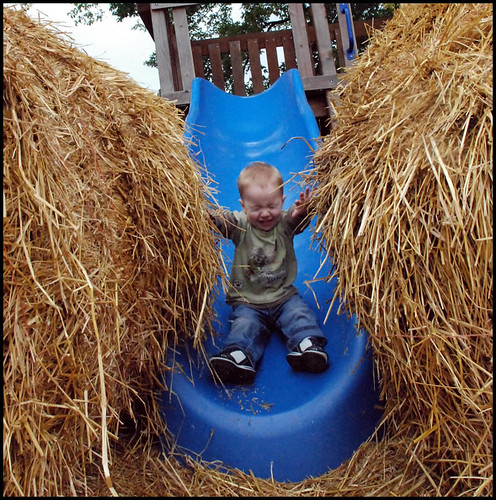
I really enjoyed Wagner Orchards and it was a perfect pace for Quinn at this stage. It wasn't super busy, had close proximity parking, allowed him to pick his own apples and contribute, gave him a safe place to run around, offered a few extras (like seeing the cows and petting the horses...and I swear I heard a sheep around somewhere), and a jungle gym for him to play on. We're also supporting a locally owned and run family business.
It was a great family outing, and we will definitely be back!
Thing about picking apples with the kids is that you usually end up with more than you can eat...so what have I done with our apples?
* Apple Butter
* Harvest Pork and Apple Bake
Having a very active nearly 2 year old, we're always looking for things to do as a family that gets him out and active, and what better excuse in September than going apple picking? He loves apples, so it also serves as a little lesson in where his food comes from.
Wagner Orchards and Estate Winery was recommended to us by a friend.
It was perfect for us! Not ridiculously busy, equipment for Quinn to play on, apples (of course), a winery, and some good eats. I also love that it's family owned and run.
We bought a bag at the shop ($10 for a 13-15lb bag) and hopped onto the tractor's trailer. The tractor took us to the Gala section of the orchard and we walked back, picking as we went.
Quinn loved picking the apples (there were plenty of branches low enough for him), and tried to eat each and every one. We wandered down the path, filling our bag with delicious apples (they use very few chemicals and try to use natural pest control over insecticides, when possible).
We wandered over the barn where Quinn talked to the cows.
Wagner's also sells beef that's hormone and antibiotic free. They are pasture-raised (but are finished on corn...that they grow themselves).
We walked across the grass to visit with the horses and donkey.
We started back toward the buildings and "accidentally" wandered in through the winery door. There were a number of wines to choose from, but I was drawn to the ice fruit wines and picked up a bottle of the raspberry (they also had apple and blackcurrant, as well as some ice fruit wines blended with red), then followed my nose into the main shop.
There, I was tempted by some pies, strudels, sausage rolls, homemade Mennonite sausage...I wanted to tell them to just hand me a fork and put it on my tab, but I was good and only purchased some ground beef ($3.50 a lb - I made Lazy Cabbage Rolls with some of the beef and it was incredible!), a couple of strudels and some apple cider.
We went back outside and let Quinn loose on the the jungle gym!
I really enjoyed Wagner Orchards and it was a perfect pace for Quinn at this stage. It wasn't super busy, had close proximity parking, allowed him to pick his own apples and contribute, gave him a safe place to run around, offered a few extras (like seeing the cows and petting the horses...and I swear I heard a sheep around somewhere), and a jungle gym for him to play on. We're also supporting a locally owned and run family business.
It was a great family outing, and we will definitely be back!
Thing about picking apples with the kids is that you usually end up with more than you can eat...so what have I done with our apples?
* Apple Butter
* Harvest Pork and Apple Bake
Thursday, September 23, 2010
Contest!
So I just got an email about the Dairy Goodness site, and I can't believe I haven't been there before!
They are running a contest right now where you just need to create a menu with their incredible recipes (I've already put a bunch in my Recipe Box to try) and then enter your meal into the contest.
You could win a $10,000 gift certificate to RENOVATE YOUR KITCHEN!!
Click here to register and begin creating your menu!
Unfortunately, this is only available to my fellow Canadians, but there are some mouthwatering recipes on that site...worth checking out.
Lazy Cabbage Rolls
When the weather starts to cool, it makes me really happy. It means that I get to start making some of my FAVOURITE food...chilis, stews, things with squash, and I get to pull out my crockpot!
I got my crockpot over 6 years ago from my dear friend, Dawn...it has made some amazing meals...sadly, it's nearly done for this lifetime. It's been pretty cranky the past couple of times I've used it. It might be time for a new one :(
So, I got really excited that we were having some cool weather, and planned to make Lazy Cabbage Rolls. Then we hit a warm patch.
We had them anyway.
The beef I used was hormone free stuff from a local farm, Wagner Orchards. Our awesome chiropractor and friend, Dan, recommended this place.
Lazy Cabbage Rolls
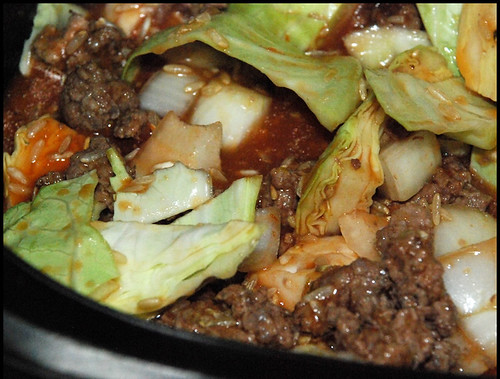
1/2 head chopped cabbage (or 1 small cabbage)
1 lb ground beef
1 large onion, chopped
2 cloves garlic, minced
2 - 8oz can tomato sauce
Salt and pepper
1 cup uncooked brown rice
3 cups water
1 can condensed tomato soup
1 tablespoon brown sugar
1 tablespoon worcestershire sauce
Brown your ground beef in a skillet. This is an important step in any crock pot with meat type meal. Browning means caramalization, which means flavour! Take advantage of this opportunity while you can! Don prefers his ground beef to be in really small pieces, but since it's going to be in the crock pot all day, I don't fuss about the size of the pieces too much. I break it down into hunks, let it brown, and dump it in the crock pot.
Toss in cabbage, onion, garlic, ONE can of tomato sauce, rice, water, and salt and pepper. Give a stir, cover, and cook 4 to 6 hours.
If you're home, stir occasionally. If not, no biggie.
Approximately 2 hours before serving (or 1 hour if you're tight for time), mix the second can of tomato sauce, tomato soup, brown sugar and worcestershire sauce in a bowl and pour on top of casserole contents. Continue to cook.
Serve how you like it (we like a blob of sour cream).
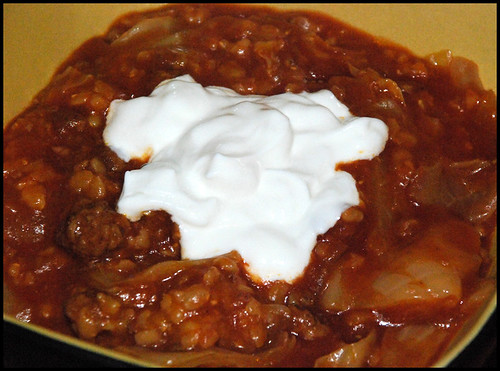
I got my crockpot over 6 years ago from my dear friend, Dawn...it has made some amazing meals...sadly, it's nearly done for this lifetime. It's been pretty cranky the past couple of times I've used it. It might be time for a new one :(
So, I got really excited that we were having some cool weather, and planned to make Lazy Cabbage Rolls. Then we hit a warm patch.
We had them anyway.
The beef I used was hormone free stuff from a local farm, Wagner Orchards. Our awesome chiropractor and friend, Dan, recommended this place.
Lazy Cabbage Rolls
1/2 head chopped cabbage (or 1 small cabbage)
1 lb ground beef
1 large onion, chopped
2 cloves garlic, minced
2 - 8oz can tomato sauce
Salt and pepper
1 cup uncooked brown rice
3 cups water
1 can condensed tomato soup
1 tablespoon brown sugar
1 tablespoon worcestershire sauce
Brown your ground beef in a skillet. This is an important step in any crock pot with meat type meal. Browning means caramalization, which means flavour! Take advantage of this opportunity while you can! Don prefers his ground beef to be in really small pieces, but since it's going to be in the crock pot all day, I don't fuss about the size of the pieces too much. I break it down into hunks, let it brown, and dump it in the crock pot.
Toss in cabbage, onion, garlic, ONE can of tomato sauce, rice, water, and salt and pepper. Give a stir, cover, and cook 4 to 6 hours.
If you're home, stir occasionally. If not, no biggie.
Approximately 2 hours before serving (or 1 hour if you're tight for time), mix the second can of tomato sauce, tomato soup, brown sugar and worcestershire sauce in a bowl and pour on top of casserole contents. Continue to cook.
Serve how you like it (we like a blob of sour cream).
Wednesday, September 22, 2010
Coconut and Chicken Soup
I was very surprised by this soup. I love the way the flavours balance one another, and it's suprisingly hearty. I'm not one for "soup for dinner". It always leaves me wanting more.
The recipe I based this off of comes from a 2 year old issue of Chatelaine magazine, and it was labelled "Hot and Sour Chicken Soup". I didn't get the "hot and sour" vibe...but they did give a nod to the Thai flavours.
This could easily be made vegetarian by swapping the chicken stock for veggie, and the fish sauce for a titch of salt. The chicken could easily (and tastily) be replaced with firm tofu!
Sambal Oelek is a chili sauce that you may find at your grocery store, or in your local Asian or Dutch market. We love it and use it quite often. If it's not available to you, use any hot chili sauce you have on hand. In a pinch, you could use a dash or two of tabasco.
Coconut and Chicken Soup
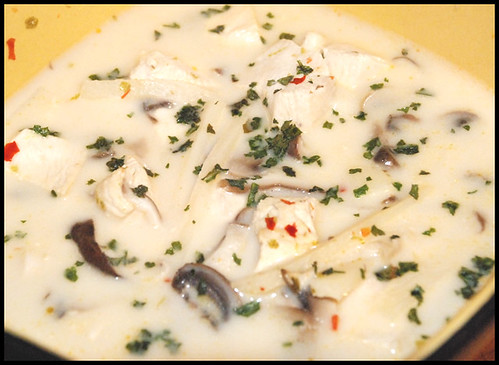
4 cups chicken stock
1 can coconut milk (not the light stuff)
Handful of button or crimini mushrooms, sliced
Two handfuls of shiitake mushrooms, sliced
Small can bamboo shoots, drained
1 tablespoon fish sauce (or less, to your taste)
1 tablespoon Sambal Oelek (more or less, to your taste)
2 limes
2 skinless, boneless chicken breasts
Fresh cilantro, chopped
Pour broth and coconut milk into a soup pot and stir to blend. Add mushrooms, bamboo shoots (mine came in strips and I cut them into matchstick sized pieces to add interest and make them easier to eat), fish sauce, and the sambal. Add zest and juice of both limes. Bring to a boil.
While waiting for the soup to heat, cut chicken into bite sized strips. Once soup is boiling, add chicken. Give it a stir and reduce heat to simmer. Cook about 10 minutes, until chicken is fully cooked. Taste and adjust salt and chili sauce balance if necessary.
Serve with a sprinkle of cilantro.
This soup was a hit with all three of us, and Quinn loved the spicy broth. He is still not really a fan of the mushrooms but neither was I when I was younger. He ate the chicken and drank the broth.
The recipe I based this off of comes from a 2 year old issue of Chatelaine magazine, and it was labelled "Hot and Sour Chicken Soup". I didn't get the "hot and sour" vibe...but they did give a nod to the Thai flavours.
This could easily be made vegetarian by swapping the chicken stock for veggie, and the fish sauce for a titch of salt. The chicken could easily (and tastily) be replaced with firm tofu!
Sambal Oelek is a chili sauce that you may find at your grocery store, or in your local Asian or Dutch market. We love it and use it quite often. If it's not available to you, use any hot chili sauce you have on hand. In a pinch, you could use a dash or two of tabasco.
Coconut and Chicken Soup
4 cups chicken stock
1 can coconut milk (not the light stuff)
Handful of button or crimini mushrooms, sliced
Two handfuls of shiitake mushrooms, sliced
Small can bamboo shoots, drained
1 tablespoon fish sauce (or less, to your taste)
1 tablespoon Sambal Oelek (more or less, to your taste)
2 limes
2 skinless, boneless chicken breasts
Fresh cilantro, chopped
Pour broth and coconut milk into a soup pot and stir to blend. Add mushrooms, bamboo shoots (mine came in strips and I cut them into matchstick sized pieces to add interest and make them easier to eat), fish sauce, and the sambal. Add zest and juice of both limes. Bring to a boil.
While waiting for the soup to heat, cut chicken into bite sized strips. Once soup is boiling, add chicken. Give it a stir and reduce heat to simmer. Cook about 10 minutes, until chicken is fully cooked. Taste and adjust salt and chili sauce balance if necessary.
Serve with a sprinkle of cilantro.
This soup was a hit with all three of us, and Quinn loved the spicy broth. He is still not really a fan of the mushrooms but neither was I when I was younger. He ate the chicken and drank the broth.
Wednesday, September 15, 2010
Quick and Easy...Szechuan Stir Fry
See, not everything I make is fancy pants! Some nights I just want to throw something together and hang out with Quinn, or get some knitting in.
Last night, was one of those nights.
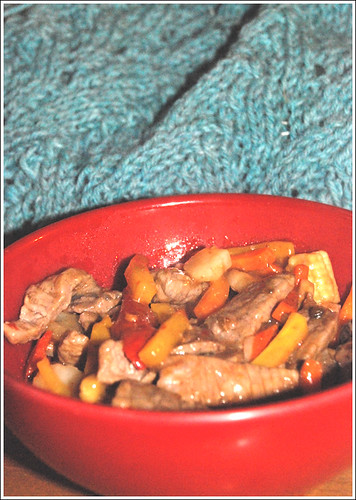
We have some beef in the freezer that I wanted to cook up. I thawed it, cut it thinly and browned it in a frying pan with some chopped mushrooms.
Pulled a bag of frozen "Asian veggies" from the ice box, stir fried them up in a wok, added the meat, and poured in some bottled sauce.
Yeah, I said it...bottled sauce.
Some days you just need a break.
I put the whole mess over some brown and red rice that I'd cooked up and called it a meal.
The sweater in the background is the Parfait Tunic from the talented Heather Dixon of Army of Knitters.
I'm almost to starting the sleeves and I'm so anxious to complete this sweater so I can wear it!
Last night, was one of those nights.
We have some beef in the freezer that I wanted to cook up. I thawed it, cut it thinly and browned it in a frying pan with some chopped mushrooms.
Pulled a bag of frozen "Asian veggies" from the ice box, stir fried them up in a wok, added the meat, and poured in some bottled sauce.
Yeah, I said it...bottled sauce.
Some days you just need a break.
I put the whole mess over some brown and red rice that I'd cooked up and called it a meal.
The sweater in the background is the Parfait Tunic from the talented Heather Dixon of Army of Knitters.
I'm almost to starting the sleeves and I'm so anxious to complete this sweater so I can wear it!
Monday, September 13, 2010
"Smells Like Comfort Food"
That's what Don said when he walked in the door.
Meatloaf
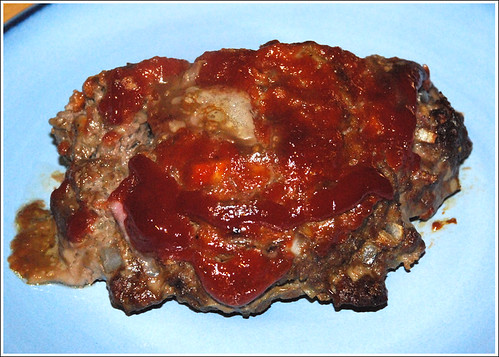
This is not the sexiest food photo ever, but man, does it taste good!
You can make the meat part however you like. Some like combinations of meat. I prefer lean ground beef. Seasoning can vary...you can use onion soup mix, or your own combination of spices and veggies.
This meatloaf had some Montreal steak spice, soya sauce, worcestershire sauce and chopped onion. I also usually put milk moistened bread crumbs in the mix because Don likes a tender, crumbly meat loaf. If you like yours a little more solid, add an egg. It's important to note that you shouldn't overwork your meat because it might make it tough. I usually mix all my stuff in the bottom of the bowl first, then squish the meat in until everything is just mixed.
I have started making, essentially, a giant burger on a sheet pan so that there's more surface area to caramelize, rather than a loaf pan...though the loaf pan makes for a nicer looking slice on the plate.
The "money" of my meatloaf is the topping. It's a combination of ketchup, brown sugar and dry mustard. I mix it up, adjusting until I am happy with the flavours, and smear it on before cooking.
How do you do your meatloaf?
Potato and Cheddar Soup
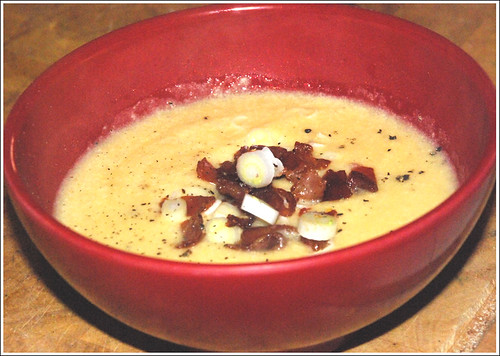
This is another one of those "throw what you have in a pot" type recipes, but I'll do my best to approximate what I use.
Chop an onion and a couple of cloves of garlic and sweat in a soup pot. Meanwhile, peel and chop 5 potatoes. Toss them into the pot to warm a bit, then add 2 cups stock. Add some thyme if you have it, and let simmer (covered) for about 20 minutes, or until the potatoes are very soft. This will be dependent upon how small and evenly you cut the potatoes in the first place.
Add 2 cups milk, and bring up to simmer (do not boil!). Continue to simmer about 10 minutes, remove from heat, and hit with an immersion blender (also called a stick blender...if you don't have one, whir it up in the blender or food processor and then put it back in the pot). Pureeing the potatoes is what is going to thicken this soup, but some people like some chunky texture. You control the degree of smoothness!
Add about a cup of shredded sharp cheddar (or whatever blend of cheese you have). Honestly, it's rarely only a cup that goes into the soup. I start with about that, and taste, adding more as I go until it tastes the way I like it. Season with salt and pepper and serve immediately.
This time, we had some proscuitto in the fridge, so I chopped it and fried it until crisp. This plus some raw chopped green onion served as our topping, but you could add anything you like on a loaded baked potato...even more cheese (I love cheese!)
Meatloaf
This is not the sexiest food photo ever, but man, does it taste good!
You can make the meat part however you like. Some like combinations of meat. I prefer lean ground beef. Seasoning can vary...you can use onion soup mix, or your own combination of spices and veggies.
This meatloaf had some Montreal steak spice, soya sauce, worcestershire sauce and chopped onion. I also usually put milk moistened bread crumbs in the mix because Don likes a tender, crumbly meat loaf. If you like yours a little more solid, add an egg. It's important to note that you shouldn't overwork your meat because it might make it tough. I usually mix all my stuff in the bottom of the bowl first, then squish the meat in until everything is just mixed.
I have started making, essentially, a giant burger on a sheet pan so that there's more surface area to caramelize, rather than a loaf pan...though the loaf pan makes for a nicer looking slice on the plate.
The "money" of my meatloaf is the topping. It's a combination of ketchup, brown sugar and dry mustard. I mix it up, adjusting until I am happy with the flavours, and smear it on before cooking.
How do you do your meatloaf?
Potato and Cheddar Soup
This is another one of those "throw what you have in a pot" type recipes, but I'll do my best to approximate what I use.
Chop an onion and a couple of cloves of garlic and sweat in a soup pot. Meanwhile, peel and chop 5 potatoes. Toss them into the pot to warm a bit, then add 2 cups stock. Add some thyme if you have it, and let simmer (covered) for about 20 minutes, or until the potatoes are very soft. This will be dependent upon how small and evenly you cut the potatoes in the first place.
Add 2 cups milk, and bring up to simmer (do not boil!). Continue to simmer about 10 minutes, remove from heat, and hit with an immersion blender (also called a stick blender...if you don't have one, whir it up in the blender or food processor and then put it back in the pot). Pureeing the potatoes is what is going to thicken this soup, but some people like some chunky texture. You control the degree of smoothness!
Add about a cup of shredded sharp cheddar (or whatever blend of cheese you have). Honestly, it's rarely only a cup that goes into the soup. I start with about that, and taste, adding more as I go until it tastes the way I like it. Season with salt and pepper and serve immediately.
This time, we had some proscuitto in the fridge, so I chopped it and fried it until crisp. This plus some raw chopped green onion served as our topping, but you could add anything you like on a loaded baked potato...even more cheese (I love cheese!)
Wednesday, September 8, 2010
Nothing fancy to report...
Last night, Don was away at supper, so Quinn and I just had pierogies (and I had a salad). Unfortunately, they were the frozen kind. If you've ever had proper, fresh made pierogies, you know that the frozen ones just don't live up to those, but they are fast and easy to make.
So...no photos today. It was a pretty boring and unimaginative (but practical) meal.
One of my friends asked about my photographs. She wanted to know if I staged them. Usually, no, I don't (though I have brought one dish down to my light box to shoot it, but I didn't do anything fancy to it). Seriously...by the time the food is ready to be eaten, I'm hungry and want to eat. Truth be told, I usually photograph Don's plate because mine usually looks like a pile of slop, but I don't make any special adjustments to it just to photograph it.
I usually have to be quick, because Don is generally standing there, just off camera, asking "Are you finished yet?"
At least I know he likes my cooking!
Tuesday, September 7, 2010
What to make when you have chicken that HAS TO BE cooked?
So, I took some chicken out of the freezer the other day with the intention of making a stir fry. I have some bottled schezwan sauce that I was planning on tweaking a bit, and some frozen "stir fry" veggies. Nice, quick, easy...except I really wasn't in the mood for eating stir fry.
That's one of the down sides of planning your meals ahead. Everything sounds so delicious when you make your list, but by the time you need to start cooking it, you might not want it.
I HAD to cook this chicken. What was I going to make?
I opened the fridge, stared in there blankly for a while, then closed the door. Opened the cupboards, stared in there blankly for a while, then closed the door. Got distracted by Iron Man Armored Adventures with Quinn, then realized that we needed to eat and I needed to stop procrastinating...and then it hit me.
I had an idea!
Checking the fridge again, I had eggs, mozzarella, parmesan, lettuce, caesar dressing, focaccia, and the chicken. In the cupboard I had jarred pasta sauce, spaghetti, and bread crumbs.
This was a no brainer...I can't believe I didn't think of it sooner!
Chicken Parmasan!
I don't have measurements here...because it's not really a recipe that you need to follow to the letter. Remember, a few posts ago when I said that you just need to know what tastes good and then put those flavours together? If you've ever had chicken parm in a restaurant, you already know how it works...you just need to have a little faith in yourself and give it a go!
You can do it (Tom *cough*)!
So here's what I did...the timing is pretty easy on this meal as well.
- Preheat the oven to 350 degrees.
- Rinse and pat dry chicken breasts (I cooked up 3 small ones, boneless, skinless).
- In shallow bowl, beat one egg.
- In second shallow bowl (or plate), put some bread crumbs (I'd say about 1/3 cup?), pepper, a titch of salt, and a handful of parmesan cheese (either freshly grated, by you, or that stuff you buy in the fancy pants cheese section already grated for you...not the Kraft stuff), and some italian herbs, dried, whatever...I used some chopped fresh basil from the garden. Alternately, you can also buy some "Italian seasoned bread crumbs" and not have to fuss about it.
- Get a baking sheet, line with foil (because I'm lazy and hate washing baking sheets). I also use a baking rack so that the chicken gets crispy on the bottom too, but that's not imperative. It's not the end of the world if you don't have one.
- Dip a chicken breast in the egg, and then the breadcrumbs to coat. Place on baking sheet (or rack) and repeat.
- Pop chicken into preheated oven for about 20 to 30 minutes, depending on how big they are. I use two methods to check doneness...a digital thermometer should read 165F to kill all the pathogens (plus, it will continue to cook a bit after you remove it, AND you'll be putting it back in to melt the cheese anyway), or I actually cut it open and look. For this recipe, you're going to be covering it up anyway. Who cares if there's a cut in it?
Ok, so you have about 20 minutes to kill at this point. Why not make some homemade croutons?
I have some "Tuscan Herb Focaccia" for some portobello burgers later this week. I cut one up into cubes, tossed in some olive oil, placed in another (foil lined) baking dish, and toasted in the oven. Keep an eye on them so they don't burn, but you're looking at about 10 minutes. Pull them out and let them cool.
Pasta cooking time (you still with me, Tom?)
- Put a pot of water on to boil.
As far as timing goes, the chicken should be nearly done when the water boils. This is where you need to be a multitasker, but it's nothing you can't handle (Tom).
Get all your stuff together in these last moments: jar of tomato sauce (I used PC Fire Roasted Tomato Sauce because it's what we had), slice some mozzarella (maybe 1/4" thick?), pasta (we love the Healthy Harvest spaghetti), mixed greens, parmesan cheese, caesar dressing, and croutons.
Ok, you ready?
- Put pasta in boiling, salted water and turn down a bit so you don't have boil over. Stir this pasta occasionally so it doesn't stick.
- Pull chicken out of the oven. Spoon a couple of tablespoons of sauce (yup, right out of the jar!) onto chicken breasts and top with sliced mozzarella. Sprinkle on a bit more parmesan cheese, and place back in oven to melt.
- Start your salad. Place a couple of tablespoons of ceasar dressing (we use the type you find in the produce section...it's super tasty!) in the bottom of a bowl, toss in your mixed greens, and mix to coat with dressing. Serve in bowls, toss in a few croutons, and top with a bit of parmesan cheese (I love using a veggie peeler to slice cheese ribbons on top...looks all "fancy pants")
Salad is done.
- Check your chicken...cheese should be melted by now. If you like a little browning on top, hit up the broiler and KEEP AN EYE ON IT! I like it just melty, and I'm a total spaz, so I avoid the broiler thing as much as possible (or most of what I make would be burnt).
Chicken is done.
- Check your pasta. Should be al dente (we should all know what that means by now, but if you like your noodles smushy, cook it until you like it). Drain pasta in a colander. While it's doing its thing in the sink, pour some of that jarred sauce into the bottom of the hot (now dry) pasta pot, give the colander a shake to get rid of any extra water, and plop the pasta into the warming sauce. Toss it around to coat with sauce, and you're ready to plate!
Pasta on the plate, chicken beside it, a little more shredded parmesan (Death by Parm?), pepper, fresh chopped basil if you have it, et voila! You've made a really fancy fricken dinner, using what you probably have in your cupboards, and it was pretty easy, no?
Enjoy, and revel in the compliments.
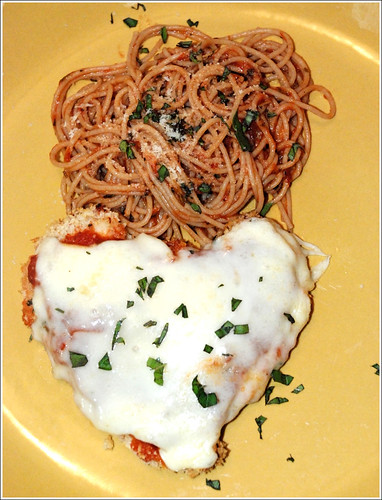
Friday, September 3, 2010
This is the post where I admit my food sucked
Last night I tried a new recipe...it was a really nice macaroni and cheese with spinach and proscuitto. The mozzarella on top was all melty and brown, the sauce was nice and creamy...mmmmm.
Holy crap, was it salty! Don says that other than the saltiness, it was tasty. I was too disappointed to agree.
I made a point to undersalt the sauce, knowing there was parmesan in there and there was going to be proscuitto added to it before it baked. What I forgot about was the pasta.
See, I salt my water (as one should unless they have dietary restrictions) "like the sea". The recipe calls for draining the pasta but for 1 cup of pasta water. The starch in the water would help bind with the thick sauce, and make it perfect and creamy and help it cling to the pasta.
No problem, except I didn't factor in the salt levels in the pasta water and that resulted in a nearly inedible meal.
Sucks, that. But you know, the recipe itself has potential. I'll try it again in a while and make a few adjustments.
Wednesday, September 1, 2010
Curry Cream Tortellini
Not sure where I got this one from, but it was jotted down in my recipe file. It turned out pretty good (of course, I made some adjustments) but I would consider thickening the sauce a bit before serving. Maybe with a cornstarch slurry.
Although, it made a really tasty soup like dish! I served it with a side salad of mixed baby greens and a garlic papadum that I toasted up in the microwave.
Curry Cream Tortellini

1 shallot, finely chopped
1 jalapeno, seeded and finely chopped (you can omit this if you're spice sensitive)
2 teaspoons curry powder
1 clove garlic
2 tablespoons olive oil
1 1/2 cup vegetable stock
1 14 oz can coconut milk
1 package tortellini (we used cheese, mushroom would be wicked good!)
4 large basil leaves, chopped
1 tablespoon honey
1 tablespoon fresh ginger
Chopped peanuts (optional)
Heat oil in saucepan and soften the chopped shallot and jalepeno (for a minute or two). Grate in garlic and add curry powder. Heat until the curry powder warms (you'll smell it!)
Add veggie broth carefully (curry facial anyone?) and bring up to a boil. Turn down to a simmer and let it do its thing for about 5 minutes, stirring a couple of times.
While that's going on, toast your chopped peanuts by placing them in a dry frying pan over the heat, shaking often, until you smell them, then remove from heat. Keep a close eye on them though, because one second it may look like they are golden brown, and the next second they will be charred and leave a horrific smell in your house that won't go away for hours. Don't say I didn't warn you.
Back to the saucepan: Pour in coconut milk, tortellini, honey and grate in ginger (I keep mine in the freezer...grates like a breeze and lasts a lot longer than leaving it out). Bring up to a simmer (DON'T BOIL) and stir until pasta is nearly done. Sprinkle in basil at the last minute, let pasta finish cooking, and serve with toasted peanuts on top if you like.
I had some store bought papadums in the cupboard so I oiled them lightly and tossed one at a time into the microwave for about 40 seconds. Burnt papadum is another one of "those smells that never go away" so keep an eye on them.
Although, it made a really tasty soup like dish! I served it with a side salad of mixed baby greens and a garlic papadum that I toasted up in the microwave.
Curry Cream Tortellini
1 shallot, finely chopped
1 jalapeno, seeded and finely chopped (you can omit this if you're spice sensitive)
2 teaspoons curry powder
1 clove garlic
2 tablespoons olive oil
1 1/2 cup vegetable stock
1 14 oz can coconut milk
1 package tortellini (we used cheese, mushroom would be wicked good!)
4 large basil leaves, chopped
1 tablespoon honey
1 tablespoon fresh ginger
Chopped peanuts (optional)
Heat oil in saucepan and soften the chopped shallot and jalepeno (for a minute or two). Grate in garlic and add curry powder. Heat until the curry powder warms (you'll smell it!)
Add veggie broth carefully (curry facial anyone?) and bring up to a boil. Turn down to a simmer and let it do its thing for about 5 minutes, stirring a couple of times.
While that's going on, toast your chopped peanuts by placing them in a dry frying pan over the heat, shaking often, until you smell them, then remove from heat. Keep a close eye on them though, because one second it may look like they are golden brown, and the next second they will be charred and leave a horrific smell in your house that won't go away for hours. Don't say I didn't warn you.
Back to the saucepan: Pour in coconut milk, tortellini, honey and grate in ginger (I keep mine in the freezer...grates like a breeze and lasts a lot longer than leaving it out). Bring up to a simmer (DON'T BOIL) and stir until pasta is nearly done. Sprinkle in basil at the last minute, let pasta finish cooking, and serve with toasted peanuts on top if you like.
I had some store bought papadums in the cupboard so I oiled them lightly and tossed one at a time into the microwave for about 40 seconds. Burnt papadum is another one of "those smells that never go away" so keep an eye on them.
Tuesday, August 31, 2010
Fishcakes and Skullheads
When we were kids, we ate Brussels sprouts a lot. My Grandma Val (I believe) told us once that they were "skullheads", and that did the trick! We ate them right up.
My "skullheads" recipe is pretty simple, and may not sound appetizing, but I assure you, they are. I pick Brussels sprouts all about the same size (smaller is tastier, as is true for a lot of veggies) but as long as they aren't the size of my hand, they are fine. A little rinse, a cut in half, and a toss into a non-stick frying pan. If there are loose leaves that fall in, don't fuss, they are actually the best part of this dish. I admit that I often peel the leaves off on purpose just so I can have more of them.
Add about 1/4 cup water and a sprinkle of salt to the pan and let the veggies steam a bit. Turn down the heat to medium-high and add a tablespoon or so of butter. Allow to melt in, shake it up occasionally, and just let it sit and caramelize.
I usually add a couple of tablespoons of butter in 2 installments, but cook until the sprouts look brown and the loose leaves almost look burnt. Not quite black, and not stinking up the house with char, but dark brown.
Doesn't sound like it would be that great, but it is ridiculously tasty.
Alternatively, you can probably Google up some "oven roasted brussels sprouts" recipes. Similar end product.
The fishcakes recipe came from the same magazine as the Yummy Cake (Canadian Family, October 2010) and it's part of the article/group of recipes that are to help people make food that everyone will enjoy if you're also cooking for those with food sensitivities. This one was called "Shellfish-Free Crab Cakes".
I call them frickin delicious. You know I don't love the fish, but try to find recipes to make the fish palatable for me so I can reap the health benefits. THIS is sooo good!
Fishcakes
1/2 lb tilapia fillets (or another whitefish, if that's all you have available)
1/2 lb salmon fillets
2 medium sized white potatoes
1/2 cup finely chopped red onion
2/4 cup finely chopped parsley
Zest of 1 lemon
1 egg
2 tablespoons seafood seasoning (recipe calls for 1 tblsp Old Bay but we don't have that here)
Pepper (and salt if you're using Old Bay)
3/4 cup panko bread crumbs
Oil for pan frying
Peel and slice potatoes thinly, cover with cold water in a saucepot and boil until done. The thinner/smaller you slice potatoes (and other root veggies), the faster they will cook...obviously. And if you cut them evenly, they will cook evenly. Magic, that!
While potatoes cook, put a large frying pan of salted water onto the stove to boil. Once the water is boiling, turn it down to simmer and poach the fish for about 6 minutes.
Drain the potatoes well (don't want soggy fishcakes!) and scoop the fish onto a paper towel lined plate.
Now, let's get down to business: In a large bowl, rice potatoes (or mash), toss in onion, parsley, lemon zest, and seasonings. Peel skin off the fish (if necessary) and flake both into bowl (big chunks, small chunks, whatever you like). Mix gently and taste for seasoning. Adjust if necessary. NOW add the egg (see what I did there?) and mix gently to incorporate.
Place breadcrumbs on a shallow bowl (or plate). I added a little bit more of my seasoning because it was really good! Grab a golf ball sized chunk of fishcake, roll into a ball and flatten slightly to form a patty. Coat in panko and place on a plate or sheetpan. Continue until you've formed all the mix. You are probably looking at about 15 or 18 patties? Pop in fridge to cool down and set a little, about 30 minutes.
In the meantime, mix 1/4 cup mayo with just under 1/4 cup ketchup. Add 2 tablespoons chopped dill pickle (I actually took a shortcut and used dill relish)...or you could use sweet pickles, finely chopped red onion, nothing aside from the mayo and ketchup...up to you. Mix and stick in fridge.
Heat a thin layer of oil in the bottom of a frying pan and brown up the fishcakes. Drain on paper towel and enjoy!
I'm sure you could also bake them after spritzing them with a little oil if you don't like the idea of pan frying.
My thoughts about the recipe? It's an incredible main, and would be a great little appetizer. Don LOVED them, as did Quinn, and me, the fish disliker thought they were wicked good. Probably because of the crispy, crusty potato, and the seasoning. I could barely taste the fish inside, and I know it was there!
It did take longer than I like to spend on a weeknight dinner, so while I would definitely make this again, I would probably save it for a weekend.
Monday, August 30, 2010
Yummy Cake
Quinn eats Oatmeal Bear Paw cookies. They are these soft cake like cookies, and they are oh so convenient, but there are things in them that I prefer not to feed him - modified palm oils, sorbitol, artificial flavours...
I'm not saying that I'm going to totally stop buying them. They do serve their purpose as an occasional convenience food, but there has to be something better for him!
Then arrives my new Canadian Family magazine (October 2010). There was a recipe under the article "Smart Foods" for Flaxen Oaty Cranerry Walnut Bars.
Comparing the Nutritional Values, there really wasn't much difference between the Bear Paws and the Bars With the Really Long Name...but the ingredients were MUCH better. I made a couple of adjustments to the recipe and made them.
Quinn called them "Yummy Cake", which is a heck of a lot easier to remember than Flaxen Oaty Cranerry Walnut Bars. I will definitely make these again. I might try some different fruit and nut combinations next time. They are tasty, and healthy, and fulfilling. Give them a try!
Yummy Cake
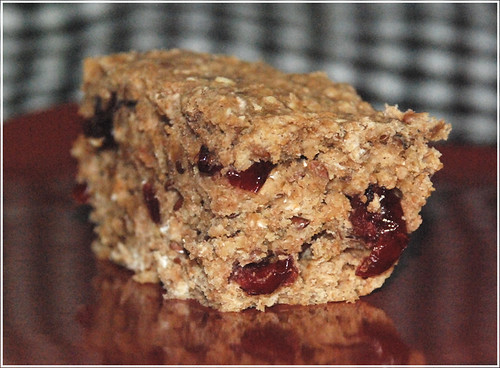
2 cups whole wheat flour
1 cup oats
1 cup dried cranberries
1/2 cup chopped pecans
1/4 flax seeds
2 tsp cinnamon
1 tablespoon baking powder
1/4 teaspoon sea salt
3/4 cup demerara sugar
1/4 cup butter, softened
2 eggs
1 1/4 cup milk
2 teaspoons vanilla
Grease 9x9 square pan (these could probably make great cookie cakes or mini muffins...adjust the baking time as necessary if you change it up) and preheat oven to 350.
Mix flour, oats, cranberries, nuts, flax, cinnamon, baking powder, and salt in a bowl.
Cream butter and sugar in a seperate bowl, and add eggs, milk, and vanilla.
Add dry ingredients to wet ingredients and mix until just combined. Pour into pan and bake about 30 minutes (or until knife inserted in centre comes out clean).
Cool in pan and cut into bars.
Really, any fruit/nut combo would work. Bits of strawberry, raspberry, blueberry, apple...mash in a banana (maybe you'd need to adjust the milk and butter for that?) The cake part is a great base for anything you like to put into your baking. Grate in some zucchini! Heck, the possibilities are endless. Do it up!
I'm not saying that I'm going to totally stop buying them. They do serve their purpose as an occasional convenience food, but there has to be something better for him!
Then arrives my new Canadian Family magazine (October 2010). There was a recipe under the article "Smart Foods" for Flaxen Oaty Cranerry Walnut Bars.
Comparing the Nutritional Values, there really wasn't much difference between the Bear Paws and the Bars With the Really Long Name...but the ingredients were MUCH better. I made a couple of adjustments to the recipe and made them.
Quinn called them "Yummy Cake", which is a heck of a lot easier to remember than Flaxen Oaty Cranerry Walnut Bars. I will definitely make these again. I might try some different fruit and nut combinations next time. They are tasty, and healthy, and fulfilling. Give them a try!
Yummy Cake
2 cups whole wheat flour
1 cup oats
1 cup dried cranberries
1/2 cup chopped pecans
1/4 flax seeds
2 tsp cinnamon
1 tablespoon baking powder
1/4 teaspoon sea salt
3/4 cup demerara sugar
1/4 cup butter, softened
2 eggs
1 1/4 cup milk
2 teaspoons vanilla
Grease 9x9 square pan (these could probably make great cookie cakes or mini muffins...adjust the baking time as necessary if you change it up) and preheat oven to 350.
Mix flour, oats, cranberries, nuts, flax, cinnamon, baking powder, and salt in a bowl.
Cream butter and sugar in a seperate bowl, and add eggs, milk, and vanilla.
Add dry ingredients to wet ingredients and mix until just combined. Pour into pan and bake about 30 minutes (or until knife inserted in centre comes out clean).
Cool in pan and cut into bars.
Really, any fruit/nut combo would work. Bits of strawberry, raspberry, blueberry, apple...mash in a banana (maybe you'd need to adjust the milk and butter for that?) The cake part is a great base for anything you like to put into your baking. Grate in some zucchini! Heck, the possibilities are endless. Do it up!
Thursday, August 26, 2010
Radish Spread
So I went to a party at a friend's place a few weeks ago, and she had this INCREDIBLE radish dip...a recipe of her Mother's. I couldn't stay away from it! I got the recipe from her and immediately set to making it.
And it just didn't taste the same as hers. No matter what I did.
When people have a "signature recipe", I think it's just impossible to replicate it. Stacy must have put some magic in that dip. Seriously.
This recipe has haunted me since. Who would have thought that radish + cream cheese (and a few other things) = wicked good? What else could I do to this combination?
Making up recipes on the fly is easy. It really is. I know, you're probably rolling your eyes (I would have been, a few years ago), but if you know what tastes good with what, you can do it! I believe in you!
Let's see what we already know: nearly everything tastes awesome with cream cheese. It's true. Add a smear of cream cheese to a roast beef sandwich. It's GOOD! But cream cheese is sort of bland...so you have to build it up with flavours.
Garlic, shallots or onions, very finely diced would fit that bill. Garlic might be a little strong with the radish as I want the radish to shine. So shallots it was...I like the sweetness of a shallot. And I'm totally lazy, so rather than chopping it super finely, I just grated it into the cream cheese.
Let's look at the radish - what tastes good with radish? Dill does!
I added a bit of this and a bit of that, and came up with this recipe...and it's pretty awesome.
I love radishes but can only do so much with them raw, you know? I am glad to now have this spread in my repitoire...it would be all sorts of awesome spread atop a toasted sesame seed bagel, or (as I was eating it this afternoon)on a multi grain cracker.
Yummeh!
Radish Spread

1 brick cream cheese, softened
1 med shallot
1 teaspoon dill weed (or more...but keep in mind that the flavour intensifies over time)
splash lemon juice
7 medium sized radishes (or more)
pinch salt
Grate shallot and radishes into cream cheese and mix. Add dill and lemon juice, stir and taste. Add a pinch of salt, mix, and taste again. Adjust any flavours as you see fit (more radish, more dill...keeping in mind that the flavour will get stronger as the dip sits...whatever).
Put dip in fridge to set up a bit and allow the flavours to meld.
And it just didn't taste the same as hers. No matter what I did.
When people have a "signature recipe", I think it's just impossible to replicate it. Stacy must have put some magic in that dip. Seriously.
This recipe has haunted me since. Who would have thought that radish + cream cheese (and a few other things) = wicked good? What else could I do to this combination?
Making up recipes on the fly is easy. It really is. I know, you're probably rolling your eyes (I would have been, a few years ago), but if you know what tastes good with what, you can do it! I believe in you!
Let's see what we already know: nearly everything tastes awesome with cream cheese. It's true. Add a smear of cream cheese to a roast beef sandwich. It's GOOD! But cream cheese is sort of bland...so you have to build it up with flavours.
Garlic, shallots or onions, very finely diced would fit that bill. Garlic might be a little strong with the radish as I want the radish to shine. So shallots it was...I like the sweetness of a shallot. And I'm totally lazy, so rather than chopping it super finely, I just grated it into the cream cheese.
Let's look at the radish - what tastes good with radish? Dill does!
I added a bit of this and a bit of that, and came up with this recipe...and it's pretty awesome.
I love radishes but can only do so much with them raw, you know? I am glad to now have this spread in my repitoire...it would be all sorts of awesome spread atop a toasted sesame seed bagel, or (as I was eating it this afternoon)on a multi grain cracker.
Yummeh!
Radish Spread
1 brick cream cheese, softened
1 med shallot
1 teaspoon dill weed (or more...but keep in mind that the flavour intensifies over time)
splash lemon juice
7 medium sized radishes (or more)
pinch salt
Grate shallot and radishes into cream cheese and mix. Add dill and lemon juice, stir and taste. Add a pinch of salt, mix, and taste again. Adjust any flavours as you see fit (more radish, more dill...keeping in mind that the flavour will get stronger as the dip sits...whatever).
Put dip in fridge to set up a bit and allow the flavours to meld.
Thursday, August 12, 2010
Dead Easy Roast & Rosemary Foccacia
I think I got the recipe for this roast online somewhere, years ago. I've made roast a bunch of different ways, but I always seem to come back to this one. It's no fuss, and it is very well received.
If it isn't broke...
Dead Easy Roast
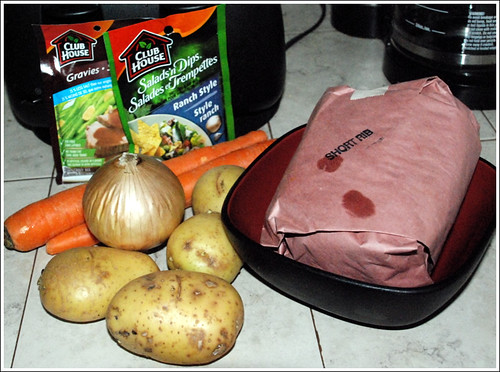
Seriously, that's it.
1 package gravy mix (I have used Bisto, brown gravy mix, mushroom gravy mix...whatever I have on hand)
1 package ranch dressing/dip mix (I've also done it with the herb dressing/dip mix and italian dressing powder mix)
1/2 cup water
A hunka roast (this is what we had in the freezer)
Veggies (in this case, an onion, and some potatoes and carrots, but whatever you like)
Get out your crock pot. Pop in the roast (if it's tied, leave the string on). Mix water and seasoning packets, pour over roast. Cover and cook for 8 hours or so. The amount of water might look low but as the roast cooks, it will add liquid (as will the veggies, after you add them).
Stir and flip occasionally (though you don't have to really do this...if you're making this roast while you're at work). Add chopped veggies (bite sized pieces) about 2 hours before crock pot time is complete.
I added a bit of rosemary from our garden to this one, but other than that, there shouldn't be a need to add salt or pepper.
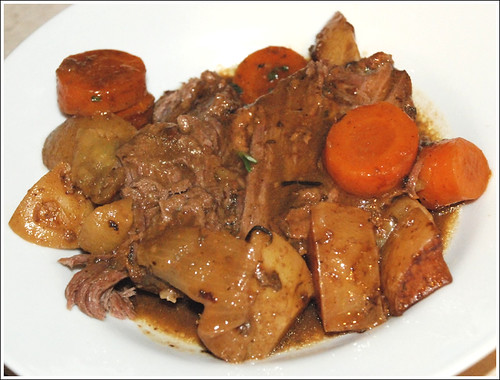
Rosemary Foccacia

This recipe is pretty forgiving, as long as you give it a *little* time to rise. I should have let this batch rise a little longer, but SOMEONE was in a hurry to eat his roast. Turned out pretty good, though.
It's based off this recipe, Black Olive Foccacia, though I obviously adjusted it. I would like to try it with black olives though.
1 cup warm water
2 teaspoons yeast
3 cups all purpose flour
1 tablespoon sugar
1 tsp salt
4 tablespoons olive oil
2 tablespoons (or more) of chopped, fresh rosemary
Course salt and chopped, fresh rosemary for top
I was so excited to have a reason to use my awesome stand mixer. Just sayin'. I had to dig out my dough hook (never used that on the mixer before) but you could totally do this by hand if you need/want to.
Pour warm water into bowl of mixer, add yeast, sugar and 1 cup of the flour and stir until combined. Let rest 10 minutes (you'll see a change as the yeast begins to activate)
Add remaining 2 cups flour, salt, olive oil, and rosemary and mix (using the dough hook) for a couple of minutes until the dough forms a ball. Continue to mix (or take it and knead it by hand) for a few minutes until the dough is smooth and elastic. Place in large, oiled bowl, cover with a towel, and place somewhere warm to rise.
The original recipe called for a 1 hour rise, but I think last night's batch got a 30 minute siesta. Punch dough down, knead a few times (by hand this time) and pull to fit on an oiled baking sheet (I think I used a 13x9 because that's what I had handy).
Poke top with fingers to make indents, drizzle a bit of olive oil and sprinkle course salt and chopped rosemary atop. Let rest another 30 minutes (we didn't have time for that last night, but it would have made for a loftier end product).
Bake in a preheated 375 oven until golden and crusty on top, and cooked (but still soft) in the centre.
The original recipe called for a 450 degree oven and 40 minutes, but in my oven, that makes the outside cook too quickly (so I knocked down the temp) and it took closer to 25 minutes to cook. Just keep an eye on it.
Cut and serve...this is great for sopping up the gravy from the roast (and a great compliment to the chef).
If it isn't broke...
Dead Easy Roast
Seriously, that's it.
1 package gravy mix (I have used Bisto, brown gravy mix, mushroom gravy mix...whatever I have on hand)
1 package ranch dressing/dip mix (I've also done it with the herb dressing/dip mix and italian dressing powder mix)
1/2 cup water
A hunka roast (this is what we had in the freezer)
Veggies (in this case, an onion, and some potatoes and carrots, but whatever you like)
Get out your crock pot. Pop in the roast (if it's tied, leave the string on). Mix water and seasoning packets, pour over roast. Cover and cook for 8 hours or so. The amount of water might look low but as the roast cooks, it will add liquid (as will the veggies, after you add them).
Stir and flip occasionally (though you don't have to really do this...if you're making this roast while you're at work). Add chopped veggies (bite sized pieces) about 2 hours before crock pot time is complete.
I added a bit of rosemary from our garden to this one, but other than that, there shouldn't be a need to add salt or pepper.
Rosemary Foccacia
This recipe is pretty forgiving, as long as you give it a *little* time to rise. I should have let this batch rise a little longer, but SOMEONE was in a hurry to eat his roast. Turned out pretty good, though.
It's based off this recipe, Black Olive Foccacia, though I obviously adjusted it. I would like to try it with black olives though.
1 cup warm water
2 teaspoons yeast
3 cups all purpose flour
1 tablespoon sugar
1 tsp salt
4 tablespoons olive oil
2 tablespoons (or more) of chopped, fresh rosemary
Course salt and chopped, fresh rosemary for top
I was so excited to have a reason to use my awesome stand mixer. Just sayin'. I had to dig out my dough hook (never used that on the mixer before) but you could totally do this by hand if you need/want to.
Pour warm water into bowl of mixer, add yeast, sugar and 1 cup of the flour and stir until combined. Let rest 10 minutes (you'll see a change as the yeast begins to activate)
Add remaining 2 cups flour, salt, olive oil, and rosemary and mix (using the dough hook) for a couple of minutes until the dough forms a ball. Continue to mix (or take it and knead it by hand) for a few minutes until the dough is smooth and elastic. Place in large, oiled bowl, cover with a towel, and place somewhere warm to rise.
The original recipe called for a 1 hour rise, but I think last night's batch got a 30 minute siesta. Punch dough down, knead a few times (by hand this time) and pull to fit on an oiled baking sheet (I think I used a 13x9 because that's what I had handy).
Poke top with fingers to make indents, drizzle a bit of olive oil and sprinkle course salt and chopped rosemary atop. Let rest another 30 minutes (we didn't have time for that last night, but it would have made for a loftier end product).
Bake in a preheated 375 oven until golden and crusty on top, and cooked (but still soft) in the centre.
The original recipe called for a 450 degree oven and 40 minutes, but in my oven, that makes the outside cook too quickly (so I knocked down the temp) and it took closer to 25 minutes to cook. Just keep an eye on it.
Cut and serve...this is great for sopping up the gravy from the roast (and a great compliment to the chef).
Wednesday, August 11, 2010
Frozen Mud Pie
Frozen Mud Pie
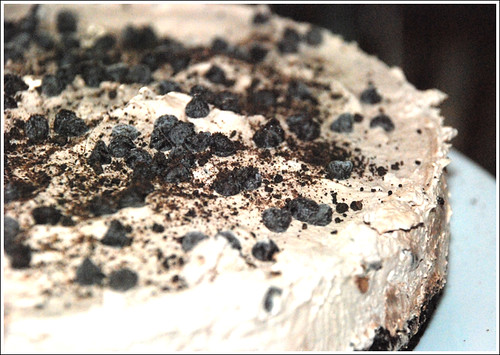
Got this recipe from Johnson's Right@Home newsletter. I made a couple of slight modifications.
1 1/2 cups chocolate cookie crumbs
3 tbsp melted butter
1 tsp water
One brick cream cheese, room temperature
1/3 cup sugar
1 tsp vanilla extract
1/3 cup cocoa powder
1/3 cup milk
One tub Cool Whip, thawed
1/3 cup mini chocolate chips, plus 2 tbsp for garnish
Preheat oven to 350 °F. Spray a 9 in springform pan with nonstick cooking spray.
In a small bowl, combine cookie crumbs with melted butter and 1 tbsp of water. Mix and press into bottom of springform pan.
Bake 15 minutes and let cool.
Beat cream cheese, sugar and vanilla until smooth. Add cocoa powder and milk, incorporating completely. Fold in Cool Whip and 1/3 cup mini chocolate chips.
Pour into cooled crust, sprinkle other mini chocolate chips on top, and toss on some extra crumbs. Do whatcha like (chopped, roasted peanuts would be really good on top too!). Freeze for a few hours.
Remove cuff from springform pan by carefully sliding knife in between pie and pan.
Cut (you might need to use a knife warmed with hot water) and serve.
It's good frozen, though my crust got ridiculously hard, or chilled in the fridge.
Pizza Pasta
Pizza Pasta can be made with whatever you have...but it is basically pizza toppings baked with pasta.
Pizza Pasta
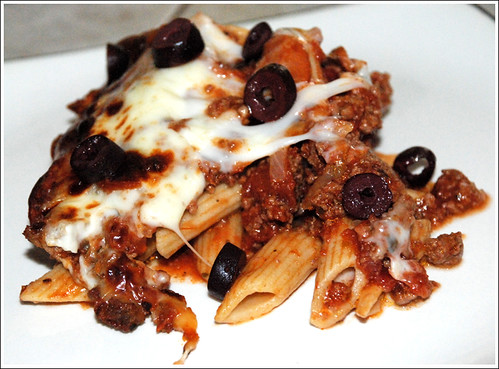
1/2 box whole grain penne
1 jar prepared pasta sauce (or, if I have some homemade leftover I use that instead)
Sliced pepperoni
Black olives
Mozzerella cheese
This time I also added ground beef with a little onion, because my Mother in Law gave me some ground beef that needed to be cooked up.
Cook noodles according to directions (maybe a smidge underdone to allow them to finish cooking in the oven if you go that route).
I browned the ground beef and drained, added the pepperoni and sauce. If I am adding veggies, I throw them in as well.
Mix saucy slop and noodles, dump into casserole, top with cheese, and bake until cheese is melted.
Freezes well and makes for great leftovers.
If you need to make this ahead (which I sometimes do when I need to use up veggies or other leftovers but don't necessarily want to eat it right away), cook the noodles and the slop and put it in the casserole, top with cheese, and freeze. When you feel like eating it, pull it out of the freezer, let it thaw, and bake it at 350 until heated through and cheese is melted.
Or, you can put the slop and noodles into individual microwaveable containers and freeze. When you want one for lunch or dinner, take it out, nuke it, and eat!
Pizza Pasta
1/2 box whole grain penne
1 jar prepared pasta sauce (or, if I have some homemade leftover I use that instead)
Sliced pepperoni
Black olives
Mozzerella cheese
This time I also added ground beef with a little onion, because my Mother in Law gave me some ground beef that needed to be cooked up.
Cook noodles according to directions (maybe a smidge underdone to allow them to finish cooking in the oven if you go that route).
I browned the ground beef and drained, added the pepperoni and sauce. If I am adding veggies, I throw them in as well.
Mix saucy slop and noodles, dump into casserole, top with cheese, and bake until cheese is melted.
Freezes well and makes for great leftovers.
If you need to make this ahead (which I sometimes do when I need to use up veggies or other leftovers but don't necessarily want to eat it right away), cook the noodles and the slop and put it in the casserole, top with cheese, and freeze. When you feel like eating it, pull it out of the freezer, let it thaw, and bake it at 350 until heated through and cheese is melted.
Or, you can put the slop and noodles into individual microwaveable containers and freeze. When you want one for lunch or dinner, take it out, nuke it, and eat!
Friday, August 6, 2010
Chicken Benedict and Honey Mustard Chicken
My Mom gave me this recipe, and she swears it came from my Aunt, who swears that she's never seen it before. I can't take credit for it, but I don't know who I can give credit to.
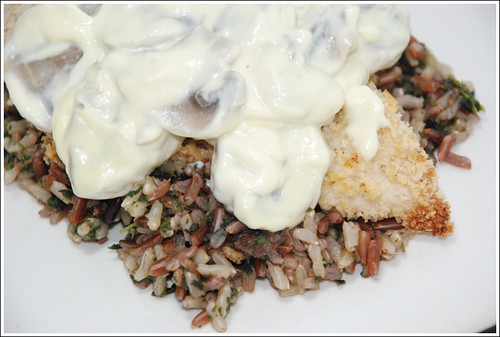
It's a fairly healthy recipe, depending on how you make the sauce. I don't do "low fat" mayo and sour cream, and Don finds the creamy sauce too heavy, so I make a honey mustard for him.
There are three components to this dish, the rice, the chicken and the sauce. You should probably make them in that order. By the time the sauce is done, the chicken and rice should be about ready to go.
The Rice
1/4 cup brown rice
1/4 cup red rice (or 1/2 cup brown rice in total)
1 1/4 cup water
4 spinach nuggets (the pkg tells me it's 85g worth, or one serving)
I have a small Salton rice cooker and the perfect ratio for rice is 1/2 cup uncooked rice, 1 1/4 cups water. I usually do half and half brown rice and red rice, but do what you like. I couldn't tell you how long the rice cooks for, my little rice cooker dealie tells me when it's done.
I add the spinach (I found genius frozen chopped spinach nuggets at WalMart) when the water is nearly cooked in. The spinach I use is already cooked. I have also done this with a handful of fresh baby spinach as well. If that's what you have, add this a tad sooner to allow it time to wilt...and make sure you chop it. No one likes a wad of slimy spinach in their rice.
Once your rice is started, it's time for...
The Chicken
2 boneless, skinless chicken breasts
1 egg, beaten
Bread crumbs (I love Panko)
Salt and pepper (or any other seasoning you like)
Preheat over to 350.
Dip chicken breasts in egg and then coat with bread crumbs (I usually season mine with a Garlic and Wine seasoning from the most heavenly restaurant, The Melting Pot - but salt and pepper, Italian seasoning, lemon pepper, whatever you like...the chicken shouldn't be super strongly seasoned though)
I place breaded chicken on a rack placed on a foil lined cookie sheet. I like to limit the amount of cleanup I (make Don) do.
Place in preheated oven and bake for about 20-30 minutes until a thermometer tells you it's done (or juices run clear, or whatever method you use).
Time to make the sauces!
Mock Hollandaise (or, "The Best Part of This Meal")
6 or so mushrooms of your choice (I usually use crimini but we had button mushrooms on hand), sliced thinly - or a can of sliced mushrooms (but these are not allowed in our house)
1/2 cup mayonnaise
1/2 cup sour cream
1 tablespoon yellow mustard
Juice of half a lemon
Salt
Paprika
Throw sliced mushrooms into a saucepan with a bit of water and boil to soften. Drain mushrooms once done and put aside. If you're using canned mushrooms, drain and rinse and set aside.
In saucepan over medium low heat, add mayo, sour cream, mustard and lemon juice. You won't die if you need to use the bottled lemon juice, but it really does taste best with fresh if you have it.
Taste this awesome sauce (and resist the urge to eat it by the spoonful) and add a little salt and a sprinkle of paprika. Add the mushrooms and heat through.
Honey Mustard Sauce for Don
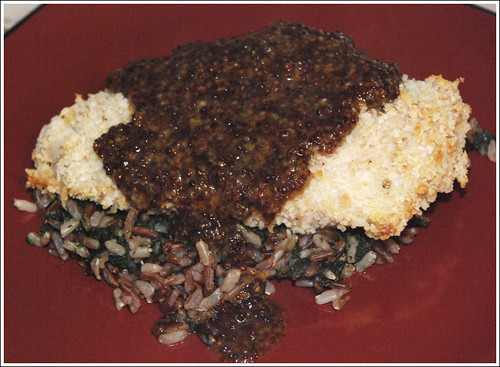
4 tablespoons whole grain Dijon mustard (or whatever mustard you have on hand)
2 tablespoons honey
2 tablespoons white wine (we had some hanging out in the fridge, im sure you could omit this if you needed to, or add water, orange juice, or stock?)
Add everything to a saucepot, bring to a boil and simmer until slightly thickened.
At this point, your rice and spinach, and chicken should be good to go.
Plate up a bed of rice, pop the breaded chicken on top, and cover with the sauce.
It's a fairly healthy recipe, depending on how you make the sauce. I don't do "low fat" mayo and sour cream, and Don finds the creamy sauce too heavy, so I make a honey mustard for him.
There are three components to this dish, the rice, the chicken and the sauce. You should probably make them in that order. By the time the sauce is done, the chicken and rice should be about ready to go.
The Rice
1/4 cup brown rice
1/4 cup red rice (or 1/2 cup brown rice in total)
1 1/4 cup water
4 spinach nuggets (the pkg tells me it's 85g worth, or one serving)
I have a small Salton rice cooker and the perfect ratio for rice is 1/2 cup uncooked rice, 1 1/4 cups water. I usually do half and half brown rice and red rice, but do what you like. I couldn't tell you how long the rice cooks for, my little rice cooker dealie tells me when it's done.
I add the spinach (I found genius frozen chopped spinach nuggets at WalMart) when the water is nearly cooked in. The spinach I use is already cooked. I have also done this with a handful of fresh baby spinach as well. If that's what you have, add this a tad sooner to allow it time to wilt...and make sure you chop it. No one likes a wad of slimy spinach in their rice.
Once your rice is started, it's time for...
The Chicken
2 boneless, skinless chicken breasts
1 egg, beaten
Bread crumbs (I love Panko)
Salt and pepper (or any other seasoning you like)
Preheat over to 350.
Dip chicken breasts in egg and then coat with bread crumbs (I usually season mine with a Garlic and Wine seasoning from the most heavenly restaurant, The Melting Pot - but salt and pepper, Italian seasoning, lemon pepper, whatever you like...the chicken shouldn't be super strongly seasoned though)
I place breaded chicken on a rack placed on a foil lined cookie sheet. I like to limit the amount of cleanup I (make Don) do.
Place in preheated oven and bake for about 20-30 minutes until a thermometer tells you it's done (or juices run clear, or whatever method you use).
Time to make the sauces!
Mock Hollandaise (or, "The Best Part of This Meal")
6 or so mushrooms of your choice (I usually use crimini but we had button mushrooms on hand), sliced thinly - or a can of sliced mushrooms (but these are not allowed in our house)
1/2 cup mayonnaise
1/2 cup sour cream
1 tablespoon yellow mustard
Juice of half a lemon
Salt
Paprika
Throw sliced mushrooms into a saucepan with a bit of water and boil to soften. Drain mushrooms once done and put aside. If you're using canned mushrooms, drain and rinse and set aside.
In saucepan over medium low heat, add mayo, sour cream, mustard and lemon juice. You won't die if you need to use the bottled lemon juice, but it really does taste best with fresh if you have it.
Taste this awesome sauce (and resist the urge to eat it by the spoonful) and add a little salt and a sprinkle of paprika. Add the mushrooms and heat through.
Honey Mustard Sauce for Don
4 tablespoons whole grain Dijon mustard (or whatever mustard you have on hand)
2 tablespoons honey
2 tablespoons white wine (we had some hanging out in the fridge, im sure you could omit this if you needed to, or add water, orange juice, or stock?)
Add everything to a saucepot, bring to a boil and simmer until slightly thickened.
At this point, your rice and spinach, and chicken should be good to go.
Plate up a bed of rice, pop the breaded chicken on top, and cover with the sauce.
Wednesday, August 4, 2010
Mexican Pizza & Cold Avocado and Leek Soup
The pizza is something I've made for a while, but the soup was adapted from Fast, Healthy Food from Readers Digest. I'll admit that I've never had cold soup. Really. I'm not kidding. The thought of a cold avocado soup made me a little twitchy, but I do love avocado, and adore the creaminess of it...and I had a few leeks in the fridge that needed to be used up, so I gave it a go.
It was a win!
I would recommend starting the leek part of the soup a few hours earlier, to allow it to cool.
Cold Avocado and Leek Soup
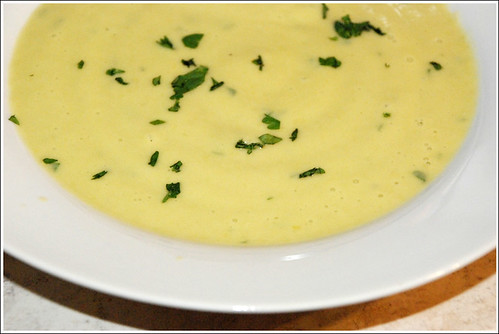
1 tablespoon olive oil
1 leek, whites thinly sliced
1 garlic clove, minced (I grate mine right into the pot)
3 cups vegetable stock
1 ripe avocado
1 small container plain yogurt (like, the single sized serving)
2 tablespoons chopped fresh cilantro
Salt and pepper
In a saucepan, heat oil and soften sliced and cleaned leeks (remember, slicing the leeks and floating them in a bowl of cold water allows the dirt and grit to fall to the bottom and the clean leeks remain at the top) for a few minutes. Pour in veggie stock, bring to a boil, and reduce to a simmer for 10 minutes or until leeks are very soft.
Put aside to cool.
Once cooled, pop leeks and broth in a blender and puree.
You don't want to open the avocado too soon because it will turn brown and the flavour will lessen. I'd serve this soup within an hour of mixing it up.
Cut avocado and remove pit, and scoop flesh into blender. Add yogurt, lime juice, and cilantro and whirr it up until smooth. Pop back into fridge to cool completely.
Serve with a little fresh cilantro on top.
The cookbook mentions that you can also serve this soup hot, but would replace the yogurt with sour cream.
Mexican Pizza
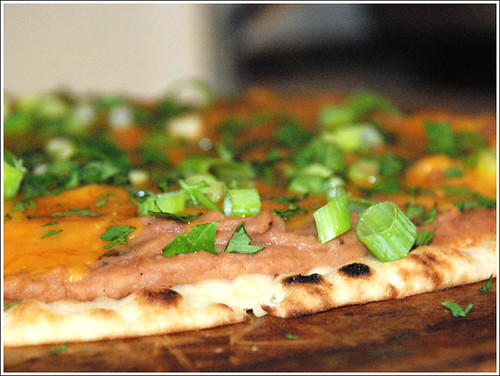
1 pizza crust (I use a PC Thin pizza crust, but you can make your own...just bake it off first)
1 cup refried beans (canned or homemade, or you can use black bean dip - see below)
Shredded cheddar
Any toppings you wish to add (or not)
Chopped fresh cilantro
Preheat your oven to 400 or so, pop in pizza stone (or you can use the underside of a cookie sheet, or other pizza pan...whatever you have). Remove stone or pan from oven, oil as necessary, and place pizza crust.
Smother beans on top - sometimes I'll use canned refried beans and add half a packet of low sodium taco seasoning. This time I used the canned beans and added some chipotle salsa I had in the fridge for seasoning. Sometimes I use a bean dip (recipe below) instead of the refried beans.
Top with shredded cheddar and anything else you'd like to add (that you want to heat up) and pop into the oven until pizza is hot and cheese is melted.
Pull out of the oven, and top with chopped cilantro and anything else you might want to put on there...I like raw green onions and I had some kicking around, so I put them on at this point.
Black Bean Dip (alternative to refried beans)
1 tablespoon olive oil
1/2 onion, diced
1 clove garlic, grated in
1 can black beans, drained and rinsed
2 tablespoons lime juice
1 tsp ground cumin
1 tablespoon (or so) fresh cilantro, to taste
Heat oil in saucepan and soften onions and garlic. Place in food processor and add rest of ingredients (aside from salt and pepper). Process until smooth, taste, and season with salt and pepper as needed. Sometimes I like to add a couple dashes of hot sauce.
It was a win!
I would recommend starting the leek part of the soup a few hours earlier, to allow it to cool.
Cold Avocado and Leek Soup
1 tablespoon olive oil
1 leek, whites thinly sliced
1 garlic clove, minced (I grate mine right into the pot)
3 cups vegetable stock
1 ripe avocado
1 small container plain yogurt (like, the single sized serving)
2 tablespoons chopped fresh cilantro
Salt and pepper
In a saucepan, heat oil and soften sliced and cleaned leeks (remember, slicing the leeks and floating them in a bowl of cold water allows the dirt and grit to fall to the bottom and the clean leeks remain at the top) for a few minutes. Pour in veggie stock, bring to a boil, and reduce to a simmer for 10 minutes or until leeks are very soft.
Put aside to cool.
Once cooled, pop leeks and broth in a blender and puree.
You don't want to open the avocado too soon because it will turn brown and the flavour will lessen. I'd serve this soup within an hour of mixing it up.
Cut avocado and remove pit, and scoop flesh into blender. Add yogurt, lime juice, and cilantro and whirr it up until smooth. Pop back into fridge to cool completely.
Serve with a little fresh cilantro on top.
The cookbook mentions that you can also serve this soup hot, but would replace the yogurt with sour cream.
Mexican Pizza
1 pizza crust (I use a PC Thin pizza crust, but you can make your own...just bake it off first)
1 cup refried beans (canned or homemade, or you can use black bean dip - see below)
Shredded cheddar
Any toppings you wish to add (or not)
Chopped fresh cilantro
Preheat your oven to 400 or so, pop in pizza stone (or you can use the underside of a cookie sheet, or other pizza pan...whatever you have). Remove stone or pan from oven, oil as necessary, and place pizza crust.
Smother beans on top - sometimes I'll use canned refried beans and add half a packet of low sodium taco seasoning. This time I used the canned beans and added some chipotle salsa I had in the fridge for seasoning. Sometimes I use a bean dip (recipe below) instead of the refried beans.
Top with shredded cheddar and anything else you'd like to add (that you want to heat up) and pop into the oven until pizza is hot and cheese is melted.
Pull out of the oven, and top with chopped cilantro and anything else you might want to put on there...I like raw green onions and I had some kicking around, so I put them on at this point.
Black Bean Dip (alternative to refried beans)
1 tablespoon olive oil
1/2 onion, diced
1 clove garlic, grated in
1 can black beans, drained and rinsed
2 tablespoons lime juice
1 tsp ground cumin
1 tablespoon (or so) fresh cilantro, to taste
Heat oil in saucepan and soften onions and garlic. Place in food processor and add rest of ingredients (aside from salt and pepper). Process until smooth, taste, and season with salt and pepper as needed. Sometimes I like to add a couple dashes of hot sauce.
Subscribe to:
Posts (Atom)